Recipes
The Ultimate Bug Juice Camp Drink Recipe for Fun and Flavor
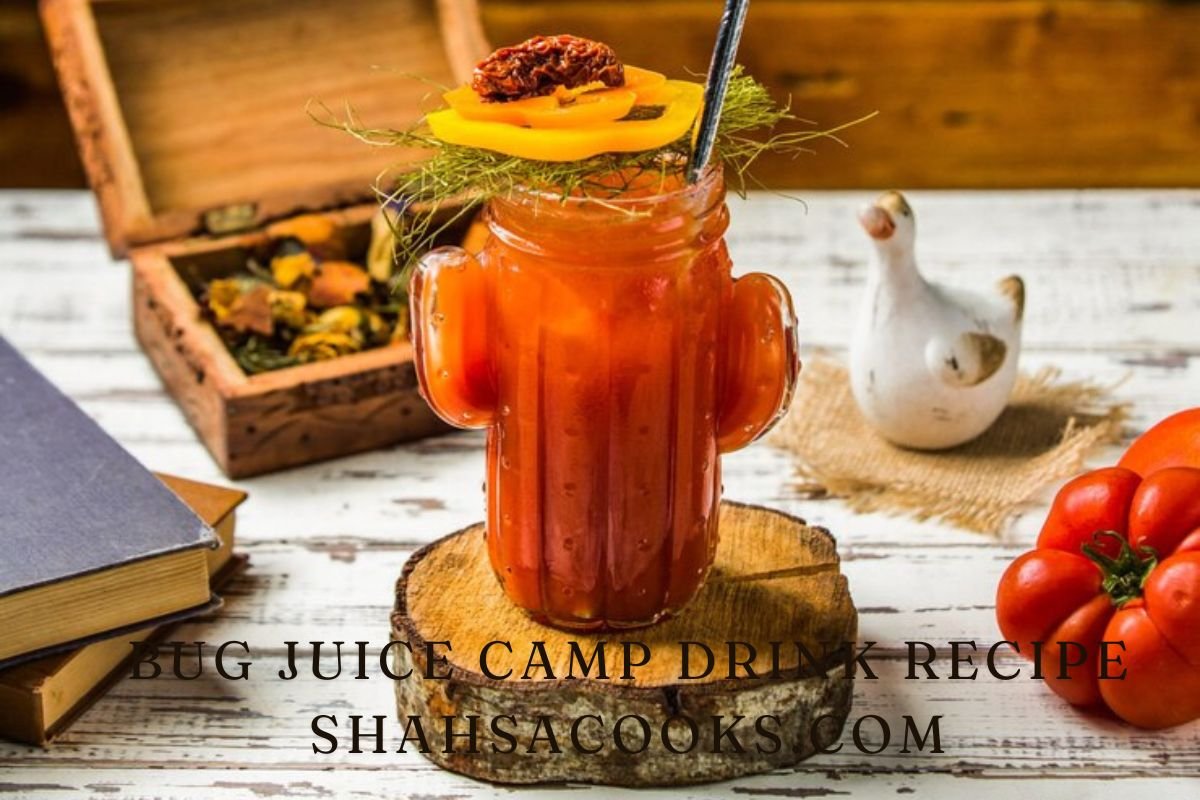
Creating memories at summer camps often involves bonding over activities, stories, and of course, sharing a delicious drink like bug juice. This vibrant and refreshing concoction is a staple at many camps, loved by kids and adults alike. Let’s dive into the ultimate bug juice camp drink recipe, ensuring you bring the fun and flavor to your next outdoor adventure.
Introduction to Bug Juice Camp Drink
Bug juice camp drink, despite its quirky name, is a delightful and fruity beverage that has become a beloved tradition at summer camps. Its bright colors and sweet flavors make it a hit with campers of all ages. Whether you’re planning a family camping trip, hosting a backyard adventure, or just looking for a fun drink to enjoy on a hot day, this bug juice camp drink recipe is sure to impress.
History and Popularity of Bug Juice
Bug juice has been a camp classic for decades, with its origins rooted in the need for a refreshing, non-alcoholic drink that can be easily prepared in large quantities. The name “bug juice” adds an element of fun and mystery, appealing to kids’ imaginations while providing a delicious treat. Over the years, this drink has become synonymous with summer camp experiences, often sparking nostalgia in adults who fondly remember their camping days.
Essential Ingredients for the Perfect Bug Juice Camp Drink Recipe
Creating the perfect bug juice camp drink requires a few simple ingredients that are easy to find and prepare. Here are the essentials:
- Fruit Punch Mix: The base of your bug juice, providing that classic, sweet flavor.
- Lemonade Mix: Adds a tangy twist to balance the sweetness.
- Grape Juice: For a rich, fruity undertone.
- Pineapple Juice: Enhances the tropical vibe.
- Water: To dilute and bring all the flavors together.
- Ice: To keep the drink chilled and refreshing.
Step-by-Step Bug Juice Camp Drink Recipe
Preparation Time: 10 Minutes
Ingredients:
- 1 packet of fruit punch mix
- 1 packet of lemonade mix
- 2 cups of grape juice
- 2 cups of pineapple juice
- 6 cups of cold water
- Ice cubes
- Fresh fruit slices (optional for garnish)
Instructions:
- Mix the Bases: In a large pitcher, combine the fruit punch mix and lemonade mix with the cold water. Stir until both mixes are completely dissolved.
- Add the Juices: Pour in the grape juice and pineapple juice, stirring well to blend all the flavors.
- Chill the Drink: Add a generous amount of ice cubes to the pitcher to keep the drink cold.
- Optional Garnish: For an extra touch of fun, add slices of fresh fruit like oranges, lemons, or strawberries.
- Serve and Enjoy: Pour the bug juice into cups, garnish with additional fruit slices if desired, and enjoy the refreshing taste of this camp favorite.
Variations and Twists on the Classic Bug Juice
While the traditional bug juice camp drink recipe is always a hit, there are plenty of ways to customize it to suit your tastes and creativity.
Tropical Bug Juice
For a more exotic twist, replace the grape juice with mango or passion fruit juice. Add a splash of coconut water for a refreshing tropical flair.
Berry Bug Juice
Substitute the grape juice with a mixed berry juice blend. Add fresh berries like blueberries, raspberries, and blackberries to enhance the fruity goodness.
Citrus Burst Bug Juice
Enhance the lemonade mix by adding freshly squeezed orange juice and lime juice. Garnish with citrus slices for a zesty kick.
Nutritional Benefits of Bug Juice
Despite its playful name, bug juice can be quite nutritious, especially when made with real fruit juices. Here are some benefits:
- Hydration: The combination of water and fruit juices helps keep you hydrated, which is essential during outdoor activities.
- Vitamins: Fresh fruit juices are rich in vitamins like vitamin C, which boosts immunity and energy levels.
- Antioxidants: Ingredients like grape juice and berries are high in antioxidants, which can help combat oxidative stress.
Tips for Serving Bug Juice at Camp
Keep It Cold
Always serve bug juice chilled. Use plenty of ice and consider storing the pitcher in a cooler if you’re outdoors for an extended period.
Make It Interactive
Let campers get involved by allowing them to mix their own bug juice. Provide a variety of juices and mixers for a fun, personalized experience.
Use Fun Cups
Serve bug juice in colorful, reusable cups or mason jars. Adding straws or drink umbrellas can make the experience even more festive.
Why Bug Juice Camp Drink is a Hit with Kids
The bug juice camp drink recipe is more than just a beverage; it’s an experience. Kids love it for its bright colors, sweet flavors, and the fun of imagining they’re drinking something magical. The name “bug juice” adds a playful element that sparks creativity and excitement, making it a memorable part of their camp adventures.
Creating a Bug Juice Station
Setting up a bug juice station can be a fantastic addition to any camp or outdoor event. Here’s how to create one:
Supplies Needed:
- Large beverage dispensers
- Various juice mixes and fresh juices
- Ice and ice buckets
- Cups, straws, and garnishes
- Fun decorations like bug-themed tablecloths and banners
Steps to Set Up:
- Prepare the Base Mix: Start with the classic bug juice base (fruit punch and lemonade mix).
- Offer Add-Ons: Provide additional juice options like tropical, berry, and citrus juices for campers to customize their drinks.
- Keep It Cool: Ensure there’s plenty of ice to keep the drinks cold throughout the event.
- Encourage Creativity: Let kids mix and match flavors, adding fruit slices or other garnishes to their cups.
FAQ
What is bug juice camp drink?
Bug juice camp drink is a fruity, colorful beverage traditionally served at summer camps. It’s made from a combination of fruit punch mix, lemonade mix, and various fruit juices, creating a sweet and refreshing drink.
Can I make bug juice healthier?
Yes, you can make bug juice healthier by using real fruit juices instead of sugary mixes. Adding fresh fruit slices and using natural sweeteners like honey can also improve its nutritional value.
Is bug juice safe for kids with allergies?
Bug juice can be adapted to be allergy-friendly. Ensure all ingredients are checked for potential allergens, and consider offering alternatives for kids with specific dietary restrictions.
How long does bug juice last?
Bug juice is best consumed fresh but can be stored in the refrigerator for up to 2-3 days. Keep it in a covered pitcher to maintain freshness.
Can I serve bug juice at other events?
Absolutely! Bug juice is a fun and versatile drink that can be enjoyed at birthday parties, picnics, and any gathering where you want to offer a refreshing, non-alcoholic beverage.
What other names does bug juice go by?
Bug juice is sometimes referred to as “camp punch” or “jungle juice,” especially when served outside of traditional camp settings.
Conclusion
The bug juice camp drink recipe is a timeless favorite that brings fun, flavor, and a touch of nostalgia to any event. Whether you’re at a summer camp, hosting a backyard party, or simply looking for a refreshing drink, this recipe is sure to please. With its simple ingredients and easy preparation, bug juice is a delightful addition to your outdoor adventures. So, gather your ingredients, mix up a batch, and enjoy the sweet taste of summer memories.
Pickels are a popular and versatile food item enjoyed worldwide, known for their tangy flavor and crunchy texture. They are typically made by fermenting or bringing vegetables, most commonly cucumbers. Here’s a brief overview of pickles and some interesting facts:
What Are Pickels?
Pickles are vegetables (or sometimes fruits) that have been preserved in a solution of brine (saltwater) or vinegar. The preservation process imparts a distinctive sour, salty, or spicy flavor, depending on the ingredients used.
Types of Pickels
- Dill Pickles: These are cucumbers pickled in a brine flavored with dill weed, garlic, and other spices. They are a staple in American cuisine.
- Bread and Butter Pickles: These are sweet and tangy pickles made with a mixture of sugar, vinegar, and spices. They are often used in sandwiches and burgers.
- Kosher Pickles: These are similar to dill pickles but are made with kosher salt and often include additional spices like coriander seeds.
- Gherkins: Small cucumbers that are pickled whole or in halves. They are often used as a garnish or in salads.
- Pickled Beets: Beets that are pickled in a spiced vinegar solution. They are popular in salads and as a side dish.
- Pickled Onions: Onions that are pickled in vinegar and spices. They add a tangy crunch to sandwiches and tacos.
How Are Pickles Made?
- Preparation: Vegetables are cleaned and cut into desired shapes.
- Brining or Vinegar Solution: The vegetables are submerged in brine (saltwater) or vinegar, sometimes with added spices and herbs.
- Fermentation: For some pickles, the solution is left to ferment for some time, allowing natural bacteria to create a sour flavor.
- Preservation: The pickles are then sealed in jars or containers to preserve them.
Different pickle recipes
Here are some different pickle recipes you can try at home, each offering its unique flavor profile:
1. Classic Dill pickels
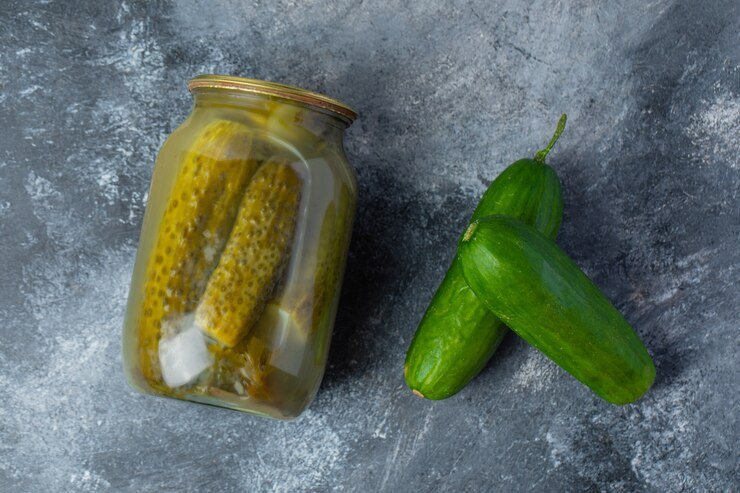
Dill pickels
Ingredients:
- 1 pound small cucumbers (pickling cucumbers)
- 2 cups water
- 1 cup white vinegar
- 2 tablespoons kosher salt
- 4 cloves garlic, peeled
- 1 tablespoon dill seeds or 2 tablespoons fresh dill
- 1 teaspoon black peppercorns
- 1/2 teaspoon mustard seeds (optional)
Instructions:
- Prepare Jars: Sterilize canning jars and lids.
- Prepare Brine: In a saucepan, combine water, vinegar, and kosher salt. Bring to a boil and stir until salt dissolves. Let it cool slightly.
- Pack Jars: Place garlic cloves, dill, peppercorns, and mustard seeds (if using) into the jars. Pack cucumbers tightly into the jars.
- Add Brine: Pour the warm brine over the cucumbers, leaving about 1/2 inch of headspace.
- Seal and Refrigerate: Wipe the rims of the jars, seal with lids, and refrigerate. Allow to pickle for at least 5 days before eating.
2. Bread and Butter pickels
Bread and Butter pickles
Ingredients:
- 4 cups sliced cucumbers
- 1 large onion, thinly sliced
- 1 cup white vinegar
- 1 cup granulated sugar
- 1/2 cup water
- 1 tablespoon mustard seeds
- 1/2 teaspoon turmeric
- 1/2 teaspoon celery seeds
- 1/2 teaspoon salt
Instructions:
- Prepare Jars: Sterilize canning jars and lids.
- Prepare Cucumbers: Place cucumber slices and onion in a bowl. Sprinkle with salt and let sit for 1 hour. Rinse and drain well.
- Prepare Brine: In a saucepan, combine vinegar, sugar, water, mustard seeds, turmeric, celery seeds, and salt. Bring to a boil and stir until sugar dissolves.
- Pack Jars: Pack cucumber and onion mixture into the jars.
- Add Brine: Pour the hot brine over the cucumbers and onions, leaving about 1/2 inch of headspace.
- Seal and Refrigerate: Wipe the rims, seal with lids, and refrigerate. Let sit for at least 24 hours before eating.
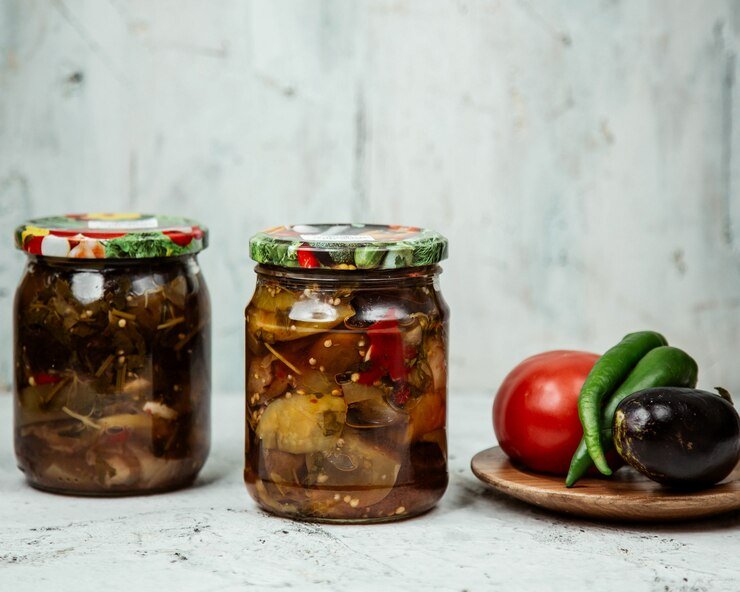
3. Spicy pickles Jalapeños

Spicy pickles Jalapeños
Ingredients:
- 1 pound fresh jalapeño peppers, sliced into rings
- 1 cup white vinegar
- 1 cup water
- 2 tablespoons sugar
- 1 tablespoon salt
- 4 cloves garlic, sliced
- 1 teaspoon cumin seeds
- 1 teaspoon coriander seeds
Instructions:
- Prepare Jars: Sterilize canning jars and lids.
- Prepare Brine: In a saucepan, combine vinegar, water, sugar, and salt. Bring to a boil and stir until sugar and salt dissolve.
- Pack Jars: Place garlic, cumin seeds, coriander seeds, and jalapeño rings into the jars.
- Add Brine: Pour the hot brine over the jalapeños, leaving about 1/2 inch of headspace.
- Seal and Refrigerate: Wipe the rims, seal with lids, and refrigerate. Let sit for at least 24 hours before eating.
4. Pickled Beets
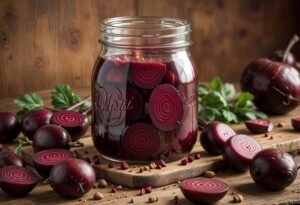
pickled-beets
Ingredients:
- 4 medium beets, peeled and sliced
- 1 cup white vinegar
- 1 cup water
- 1/2 cup granulated sugar
- 1 tablespoon salt
- 1 teaspoon whole cloves
- 1 cinnamon stick
Instructions:
- Prepare Beets: Boil beets in a pot of water until tender, about 30 minutes. Peel and slice.
- Prepare Jars: Sterilize canning jars and lids.
- Prepare Brine: In a saucepan, combine vinegar, water, sugar, salt, cloves, and a cinnamon stick. Bring to a boil and stir until sugar dissolves.
- Pack Jars: Place beet slices into the jars.
- Add Brine: Pour the hot brine over the beets, leaving about 1/2 inch of headspace.
- Seal and Refrigerate: Wipe the rims, seal with lids, and refrigerate. Let sit for at least 24 hours before eating.
5. Pickled Carrots with Ginger
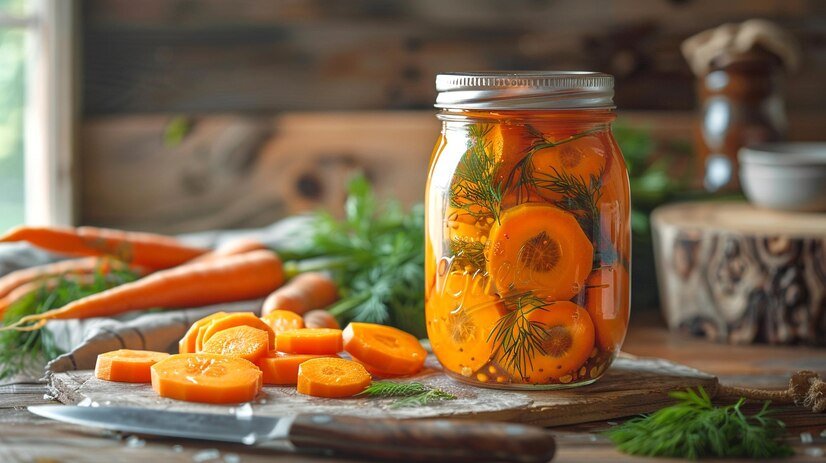
Pickled Carrots with Ginger
Ingredients:
- 4 large carrots, peeled and sliced into sticks
- 1 cup rice vinegar
- 1 cup water
- 1/2 cup sugar
- 1 tablespoon salt
- 2 tablespoons fresh ginger, sliced
- 1 teaspoon whole black peppercorns
Instructions:
- Prepare Jars: Sterilize canning jars and lids.
- Prepare Brine: In a saucepan, combine vinegar, water, sugar, and salt. Bring to a boil and stir until sugar and salt dissolve.
- Pack Jars: Place ginger slices, peppercorns, and carrot sticks into the jars.
- Add Brine: Pour the hot brine over the carrots, leaving about 1/2 inch of headspace.
- Seal and Refrigerate: Wipe the rims, seal with lids, and refrigerate. Let sit for at least 24 hours before eating.
These recipes offer a variety of pickled flavors and can be adjusted to suit your taste preferences. Enjoy your homemade pickles!
Interesting Facts About pickels
- Historical Significance: Pickles have been enjoyed for thousands of years. They were a staple in the diet of ancient civilizations, including the Egyptians and Romans.
- Health Benefits: Pickles can be a good source of probiotics if they are naturally fermented. They also contain vitamins and minerals, though they are high in sodium.
- Cultural Variations: Pickles are made from a variety of vegetables and fruits around the world, with regional variations in spices and preparation methods.
- Cooking with Pickles: Pickles can be used in cooking and baking to add flavor. For example, pickle juice can be used in marinades, or pickles can be incorporated into dishes like potato salad or burgers.
Whether you enjoy them as a crunchy snack, a condiment, or a flavorful ingredient in dishes, pickles offer a tangy taste and versatile uses that make them a beloved food around the globe.
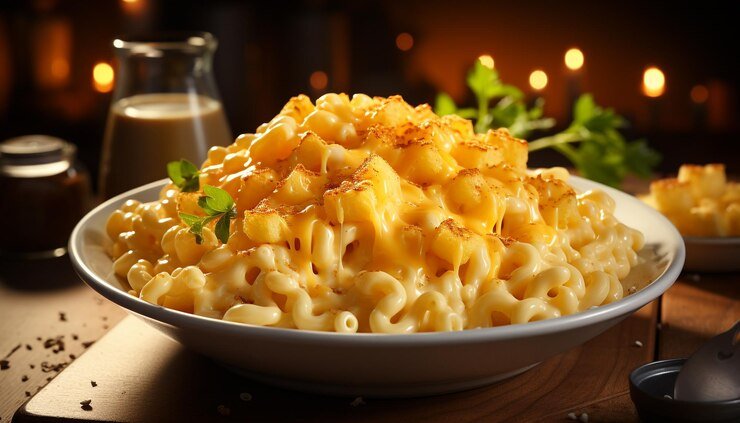
Homemade cheeseburger macaroni is a nostalgic dish that combines the rich flavors of a cheeseburger with the creamy goodness of macaroni and cheese. While store-bought versions may be convenient, nothing beats the taste and satisfaction of making this comfort food classic from scratch. With fresh ingredients and a few simple steps, you can whip up a dish that’s not only delicious but also customizable to your taste.
Why Go Homemade?
Making cheeseburger macaroni from scratch offers several advantages:
- Fresh Ingredients: You have control over the quality of the ingredients, ensuring that everything is fresh and free from preservatives.
- Customization: You can tailor the recipe to your dietary preferences, whether that means using leaner meats, adding extra veggies, or experimenting with different cheeses.
- Healthier: Homemade versions can be lighter and healthier than their boxed counterparts, with less sodium and fewer artificial additives.
- Flavorful: Freshly prepared ingredients deliver a depth of flavor that’s hard to match with pre-packaged meals.
Homemade Cheeseburger Macaroni Recipe
Ingredients:
- 1 lb (450g) ground beef
- 2 cups (8 oz/225g) elbow macaroni or your preferred pasta
- 1 small onion, finely chopped
- 2 cloves garlic, minced
- 2 cups (475ml) beef broth
- 1 cup (240ml) milk (whole or 2%)
- 2 cups (8 oz/225g) shredded cheddar cheese
- 1 tablespoon Worcestershire sauce (optional)
- 1 teaspoon paprika
- 1 teaspoon mustard powder (optional)
- Salt and pepper to taste
- 1 tablespoon olive oil or butter (for sautéing)
- Fresh parsley, chopped (for garnish, optional)
Instructions:
-
Cook the Pasta:
- In a large pot of salted boiling water, cook the pasta according to the package instructions until al dente. Drain and set aside.
-
Brown the Beef:
- In a large skillet, heat olive oil or butter over medium heat. Add the ground beef and cook until browned, breaking it up into small crumbles as it cooks. Once fully cooked, drain any excess fat.
-
Sauté the Onion and Garlic:
- Add the chopped onion to the skillet with the beef and cook until softened and translucent, about 3-4 minutes. Add the minced garlic and cook for an additional 1-2 minutes until fragrant.
-
Prepare the Sauce:
- Stir in the beef broth, milk, Worcestershire sauce (if using), paprika, mustard powder (if using), salt, and pepper. Bring the mixture to a simmer and let it cook for 5-7 minutes, allowing the flavors to meld.
-
Add the Cheese:
- Gradually stir in the shredded cheddar cheese, a little at a time, until it’s fully melted and the sauce is smooth and creamy.
-
Combine with Pasta:
- Add the cooked pasta to the skillet, stirring to combine and ensuring that the pasta is evenly coated with the cheesy beef mixture.
-
Serve:
- Garnish with freshly chopped parsley if desired, and serve hot. Enjoy the creamy, comforting flavors of homemade cheeseburger macaroni!
Tips:
- If the sauce is too thick, add a splash of milk to reach your desired consistency.
- For a casserole-style dish, transfer the combined pasta and sauce to a baking dish, top with extra cheese, and bake at 375°F (190°C) for 10-15 minutes until bubbly and golden.
Enjoy your homemade cheeseburger macaroni!
Ingredients for Homemade Cheeseburger Macaroni
The ingredients for homemade cheeseburger macaroni are simple, yet they come together to create a dish bursting with flavor:
- Ground Beef: Choose high-quality, lean ground beef. Grass-fed or organic beef can add an extra layer of flavor.
- Pasta: Elbow macaroni is traditional, but feel free to use other pasta shapes like rotini or penne.
- Cheese: Sharp cheddar cheese is ideal for its rich flavor, but a blend of cheeses like mozzarella, Monterey Jack, or even a bit of Gouda can create a more complex taste.
- Onions and Garlic: These aromatics are essential for building the dish’s flavor base.
- Broth or Milk: A combination of beef broth and milk creates a creamy sauce that’s both rich and savory.
- Seasonings: Classic seasonings include salt, pepper, paprika, and a hint of mustard powder. You can also add Worcestershire sauce for a deeper umami flavor.
Variations and Tips
- Healthier Substitutions: Use ground turkey or chicken for a leaner version, whole wheat or gluten-free pasta, and reduced-fat cheese.
- Vegetable Boost: Incorporate vegetables like bell peppers, spinach, or mushrooms to add color, flavor, and nutrients.
- Spice it Up: For a spicy kick, add a pinch of cayenne pepper, chili powder, or even some diced jalapeños.
- Make it a Casserole: After combining the pasta and sauce, transfer the mixture to a baking dish, top with extra cheese, and bake until bubbly and golden for a cheeseburger macaroni casserole.
Why Homemade is Worth the Effort
While it might be tempting to reach for a boxed version, homemade cheeseburger macaroni offers unparalleled freshness, flavor, and satisfaction. The process of cooking from scratch allows you to enjoy a meal that’s not only delicious but also crafted with care and attention to detail. Plus, it’s a versatile dish that can be adapted to suit any palate.
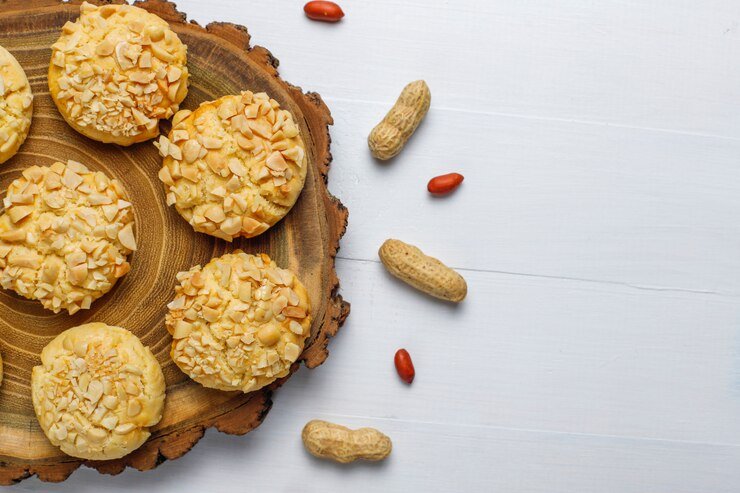
Peanut butter cornflake cookies are a beloved treat that combines peanut butter’s rich, creamy flavor with the satisfying crunch of cornflakes. These no-bake cookies are quick and easy to prepare, perfect for last-minute gatherings, after-school snacks, or a nostalgic indulgence.
A Brief History
The origins of peanut butter cornflake cookies can be traced back to the mid-20th century when simple, no-bake recipes became popular in American households. Like many other no-bake treats, these cookies emerged when convenience was key, and homemakers sought recipes that required minimal ingredients and effort. Peanut butter, which had become a pantry staple by this time, combined beautifully with cornflakes, a cereal that had been popularized by the Kellogg brothers in the early 1900s.
The Magic of Peanut Butter and Cornflakes
The beauty of peanut butter cornflake cookies lies in their simplicity. The combination of peanut butter and cornflakes creates a texture that is both chewy and crunchy, while the sweet and salty flavor profile makes them irresistible. The cornflakes add a light, crispy texture that contrasts perfectly with the smooth, rich peanut butter, creating a balanced and satisfying bite.
Peanut Butter Cornflake Cookies recipe
Here’s a straightforward recipe for Peanut Butter Cornflake Cookies:
Ingredients:
- 1 cup peanut butter (smooth or crunchy)
- 1 cup sugar
- 1 cup light corn syrup
- 6 cups cornflakes
- 1 teaspoon vanilla extract (optional)
- A pinch of salt (optional)
Instructions:
- Prepare the Syrup: In a large saucepan, combine the sugar and light corn syrup. Heat over medium heat, stirring constantly, until the sugar is completely dissolved and the mixture is smooth. Be careful not to let it boil.
- Add the Peanut Butter: Remove the saucepan from the heat and immediately stir in the peanut butter and vanilla extract (if using). Mix until the peanut butter is fully melted and the mixture is creamy.
- Incorporate the Cornflakes: Gently fold in the cornflakes, making sure they are evenly coated with the peanut butter mixture. Be sure to work quickly before the mixture begins to set.
- Shape the Cookies: Using a spoon or cookie scoop, drop spoonfuls of the mixture onto a parchment-lined baking sheet. You can shape them into rounds or leave them in rustic mounds.
- Set the Cookies: Allow the cookies to cool and set at room temperature for about 30 minutes. If you need them to set faster, place the baking sheet in the refrigerator for 15 minutes.
- Serve and Store: Once set, enjoy your cookies! Store any leftovers in an airtight container at room temperature for up to a week.
Variations and Tips
- Chocolate Drizzle: For an extra indulgent touch, drizzle melted chocolate over the cookies after they’ve set. This adds a delightful layer of richness that complements the peanut butter.
- Nutty Addition: If you’re a fan of extra crunch, consider adding chopped peanuts or other nuts to the mixture before forming the cookies.
- Healthier Twist: Substitute honey or maple syrup for the corn syrup for a slightly healthier version. You can also use natural peanut butter to reduce the sugar content.
- Marshmallow Mix-In: For a gooey twist, add mini marshmallows to the mixture along with the cornflakes. The marshmallows will melt slightly, creating a chewy, sticky texture.
Why You’ll Love Them
Peanut butter cornflake cookies are the perfect balance of sweet and salty, chewy and crunchy. They’re incredibly versatile, allowing you to tweak the ingredients to suit your taste or dietary needs. Plus, the nostalgic flavor will transport you back to simpler times, making them a delightful treat for both kids and adults alike.
Whether you’re making them for a party, a quick snack, or just to satisfy a sweet craving, peanut butter cornflake cookies are sure to become a go-to recipe in your kitchen. Enjoy the delightful combination of flavors and textures in each bite of these classic, no-bake cookies!
-

 FOOD2 months ago
Nasi Uduk
-

 Recipes2 months ago
Smoothie CCL: A Delicious and Nutritious Trend
-

 BLOGS2 months ago
Unveiling the Innovation: BoltBól – Revolutionizing Accessibility and Mobility
-

 FOOD2 months ago
Common Malay Ingredient List
-

 FOOD2 months ago
Cornflake Meringue Cookies
-

 FOOD2 months ago
Çeciir: A Journey Through Turkish Cuisine
-

 Recipes2 months ago
Crab Brulee Recipe: A Gourmet Delight
-

 BLOGS2 months ago
Fruit with a Large Flat Pit: A Common NYT Crossword Clue