HOME IMPROVEMENET
Unica Smart Security Zwille with Intelligent Technology

As technology advances, so does our approach to home security. The Unica Smart Security Zwille system is a game-changer in safeguarding homes, combining cutting-edge technology with user-friendly features. This innovative solution offers peace of mind through smart integrations, real-time monitoring, and seamless automation.
In this article, we will explore the features, benefits, and practical applications of Unica Smart Security Zwille, showing why it’s a must-have for modern homeowners.
What Is Unica Smart Security Zwille?
The Unica Smart Security Zwille is a state-of-the-art home security system designed to provide advanced protection through smart sensors, cameras, and automation. It leverages the Internet of Things (IoT) and artificial intelligence to deliver unparalleled control and security.
Whether you’re home or away, Zwille’s intelligent features keep you connected and your home secure.
Key Features of Unica Smart Security Zwille
1. Advanced Motion Detection
Zwille uses AI-powered sensors that can distinguish between real threats and false alarms, such as pets or weather-related movements.
- Customizable Sensitivity: Adjust detection levels based on your needs.
- Real-Time Notifications: Alerts are sent instantly to your smartphone for any suspicious activity.
2. 360° Surveillance Cameras
The system includes high-definition cameras with panoramic coverage to eliminate blind spots.
- Night Vision: Provides clear footage even in complete darkness.
- Live Streaming: Access real-time video feeds from anywhere in the world via the mobile app.
3. Smart Home Integration
Zwille integrates seamlessly with other smart devices, such as:
- Smart locks
- Lighting systems
- Voice assistants like Alexa or Google Assistant
This interconnected system enhances convenience and automation in your home.
4. Two-Way Communication
Built-in microphones and speakers enable two-way communication through cameras, making it easy to interact with visitors or deter potential intruders remotely.
5. Emergency Response System
In the event of a security breach, the system can automatically alert local authorities or a designated contact, ensuring a swift response.
6. User-Friendly App Control
Manage the entire system through an intuitive mobile app.
- Arm and disarm the system remotely.
- View live footage or playback recorded clips.
- Adjust settings for cameras, alarms, and sensors with ease.
7. Energy Efficiency
Zwille prioritizes eco-friendly design by using low-energy sensors and optimizing power consumption without compromising performance.
Benefits of Choosing Unica Smart Security Zwille
The Unica Smart Security Zwille system is a modern solution tailored to meet the demands of smart home security. With its advanced technology and intuitive features, it delivers numerous benefits that make it a top choice for homeowners. Here’s why investing in Unica Smart Security Zwille is a smart decision:
Enhanced Safety and Protection
The primary benefit of Zwille is the peace of mind it provides. Its AI-powered sensors, high-definition cameras, and real-time alerts ensure your home is continuously monitored and protected from potential threats.
- 24/7 Monitoring: Around-the-clock surveillance safeguards your property, even when you’re away.
- Proactive Threat Detection: Immediate alerts allow for quick action, whether it’s contacting authorities or checking your home remotely.
Smart Integration for Seamless Automation
Zwille integrates effortlessly with other smart home devices, creating a cohesive ecosystem that simplifies daily life.
- Control Lighting and Locks: Manage lights and door locks through the same platform, enhancing security and convenience.
- Voice Assistant Compatibility: Works with Alexa, Google Assistant, and other voice-enabled devices for hands-free operation.
Cost-Effective Home Security Solution
Combining multiple functionalities into one system, Zwille eliminates the need for separate devices, saving both money and space.
- Reduced Equipment Costs: The system’s all-in-one design minimizes the need for additional gadgets.
- Long-Term Value: Its energy-efficient components reduce operational costs over time.
Energy Efficiency
Zwille’s eco-conscious design prioritizes energy conservation without compromising performance.
- Low-Power Sensors: Operate efficiently to minimize electricity consumption.
- Sustainable Security: Helps reduce your home’s carbon footprint.
User-Friendly Controls
With its intuitive mobile app, Zwille is easy to manage and operate, even for those new to smart technology.
- Remote Access: Arm or disarm the system and monitor your home from anywhere in the world.
- Customizable Alerts: Tailor notifications to suit your preferences, ensuring you’re always informed.
Real-Time Communication
Zwille’s two-way communication feature allows you to interact with visitors or deter intruders remotely.
- Enhanced Visitor Management: Speak directly to delivery personnel or guests through the built-in microphone and speaker.
- Increased Security: Use the feature to warn off potential intruders if necessary.
Scalability and Adaptability
Whether you live in a small apartment or a large house, Zwille’s modular design can be scaled to fit your needs.
- Customizable Setup: Add or remove devices to match your home’s size and requirements.
- Future-Proof Technology: Stay updated with regular firmware upgrades and expand capabilities as your needs grow.
Privacy and Data Security
Zwille prioritizes the protection of your personal data, ensuring your information remains secure.
- Encrypted Communications: Safeguards data transmissions from devices to the app.
- Cloud and Local Storage Options: Choose where to store recorded footage based on your preferences.
Reliable Emergency Response
In case of an emergency, Zwille can automatically notify local authorities or a designated contact for a quick response.
- Automated Alerts: Direct communication with law enforcement in critical situations.
- Peace of Mind: Know that help is just a notification away.
How to Set Up Unica Smart Security Zwille
Step 1: Unbox and Place Devices
Start by unboxing your Zwille package. Position sensors and cameras in strategic locations like entry points, hallways, and living areas.
Step 2: Connect to Wi-Fi
Follow the app’s instructions to connect the devices to your home’s Wi-Fi network. Ensure a stable connection for uninterrupted functionality.
Step 3: Customize Settings
Use the app to configure motion sensitivity, camera angles, and notification preferences.
Step 4: Test the System
Conduct a test run to verify that all devices are functioning correctly. Adjust settings as needed for optimal performance.
Comparison: Unica Smart Security Zwille vs. Competitors
| Feature | Unica Smart Security Zwille | Competitor Systems |
|---|---|---|
| AI-Powered Motion Detection | ✅ | ❌ |
| 360° Panoramic Cameras | ✅ | ✅ |
| Smart Home Integration | ✅ | ✅ |
| Energy Efficiency | ✅ | ❌ |
| User-Friendly App | ✅ | ✅ |
FAQs
What makes Unica Smart Security Zwille unique?
Zwille stands out for its AI-driven motion detection, seamless smart home integration, and energy-efficient design.
Is the system compatible with older homes?
Yes, Zwille’s modular design ensures compatibility with homes of all sizes and ages.
Do I need professional installation?
No, the system is designed for easy DIY setup, but professional installation is optional for those who prefer assistance.
Can Zwille operate without internet?
While certain features require internet connectivity, basic functions like alarms and sensors can operate offline.
Does the system store video footage?
Yes, Zwille supports both local storage and cloud options for recording and reviewing footage.
Can I integrate Zwille with existing smart devices?
Yes, it works seamlessly with popular smart home platforms like Alexa, Google Assistant, and SmartThings.
Conclusion
The Unica Smart Security Zwille is more than just a home security system; it’s a comprehensive solution for modern living. Its intelligent features, ease of use, and adaptability make it a top choice for those seeking to enhance their home’s safety and convenience.
By investing in Zwille, you’re not just securing your home—you’re stepping into the future of smart living. With advanced technology and user-friendly controls, it’s time to experience the peace of mind that comes with Unica Smart Security Zwille.
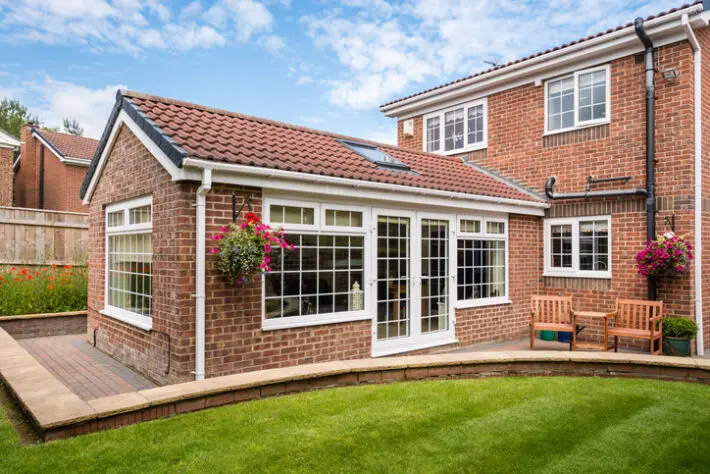
Extending your home is a fantastic way to create more space, improve functionality, and even increase the value of your property. However, planning a home extension requires careful thought and preparation to ensure the process goes smoothly and delivers the desired results. In this guide, we’ll explore everything you need to know about planning your home extension, from initial ideas to execution.
Understanding the Purpose of Your Home Extension
Before diving into the logistics, defining why you want a home extension is essential. Are you looking to add an extra bedroom, create an open-plan kitchen, or design a peaceful home office? Having a clear purpose will help guide your decisions throughout the process.
Consider Your Current Space
Take stock of your existing space. What are its strengths and weaknesses? Understanding how you currently use your home will allow you to identify what needs improvement and how a home extension can address those issues.
Future Needs and Lifestyle
Think about how your needs may evolve. A growing family, new hobbies, or remote work arrangements might influence the type of extension that suits you best. Planning for the future can save you from costly renovations later.
Budgeting for Your Home Extension
Your budget will significantly impact the scope and style of your home extension. Setting a realistic financial plan is crucial to avoid surprises.
Costs to Consider
When calculating your budget, include the construction costs, fees for architects and engineers, and any required permits. Remember finishes such as flooring, lighting, and furnishings, as these can quickly add up.
Contingency Funds
It’s always wise to set aside a contingency fund. Unexpected expenses often arise during construction, and having extra money earmarked for such instances can help keep your project on track.
Designing Your Dream Space
Once you have a clear idea of your goals and budget, it’s time to bring your vision to life through thoughtful design.
Collaborate with Professionals
Working with architects or designers can ensure your home extension is functional and aesthetically pleasing. They can also help you navigate local building regulations and maximize the potential of your property.
Optimise Natural Light
A well-designed home extension should enhance natural light. Incorporate large windows, skylights, or sliding glass doors to make the new space feel airy and inviting.
Blend Old and New
The design of your extension should complement your existing home to maintain harmony. Consider materials, colours, and architectural details that seamlessly tie the old and new spaces together.
Navigating Planning Permissions and Regulations
Specific home extensions may require planning permission or adherence to building regulations depending on where you live.
Check Local Requirements
Before starting construction, consult your local authorities to determine the necessary permissions. Some minor extensions may fall under permitted development rights, but larger projects typically require approval.
Structural Integrity and Safety
Ensure that your plans meet all safety and structural standards. This includes foundations, load-bearing walls, and insulation, among other considerations.
Choosing the Right Contractors
Hiring the right contractors ensures your home extension is completed on time, within budget, and to a high standard.
Do Your Research
Seek recommendations from friends or family, and check reviews before hiring. Always request quotes from multiple contractors and ensure they are licensed and insured.
Communicate Clearly
Provide your contractors with detailed plans and maintain open communication throughout the project. Regular updates will help prevent misunderstandings and keep the project moving forward.
Managing the Construction Process
Once construction begins, staying organised and proactive is critical to a successful home extension.
Create a Timeline
Work with your contractors to establish a realistic timeline. Knowing when each project phase will be completed helps you plan around potential disruptions.
Stay Involved
While you don’t need to micromanage, staying involved ensures that your vision is being executed. Regular site visits and discussions with your contractor can help catch any issues early.
Adding the Finishing Touches
The final touches will bring your home extension to life as construction wraps up.
Interior Design
Think about how you’ll furnish and decorate the new space. Consider practical elements like storage and decorative details that reflect your style.
Landscaping
If your home extension impacts your outdoor area, landscaping can help integrate the new structure with your garden or yard. Add plants, pathways, or seating areas to create a cohesive and inviting space.
Enjoying Your New Home Extension
Once everything is complete, it’s time to enjoy the fruits of your labour. Whether it’s a cozy family room, a sleek modern kitchen, or a serene office space, your home extension should enhance your lifestyle and provide the comfort and functionality you envisioned.
Final Thoughts
Planning a home extension can feel overwhelming, but with careful preparation, it’s a rewarding endeavour. By understanding your needs, setting a clear budget, and working with skilled professionals, you can create a space that enhances your home and quality of life. Embrace the process, and soon, you’ll enjoy a beautiful new addition to your home.
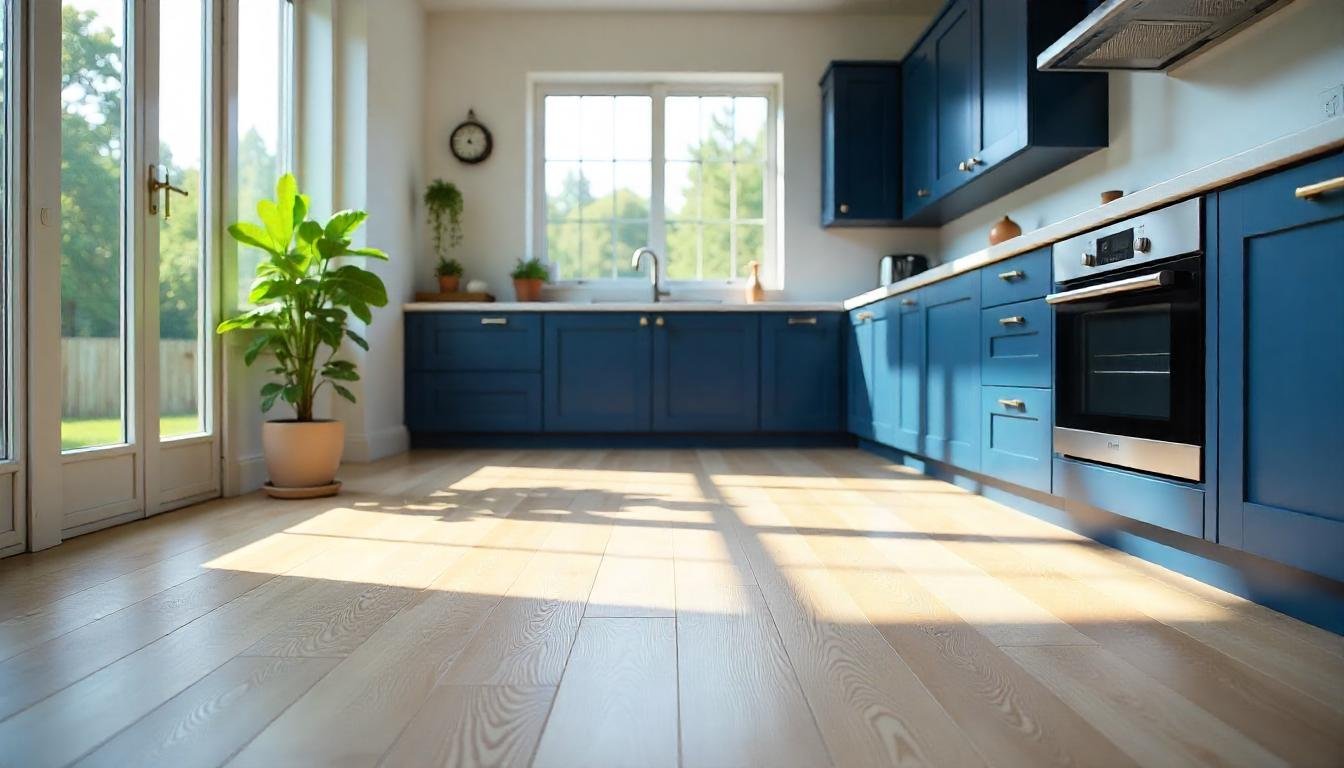
When living in areas prone to hurricanes, preparing your home against the damaging effects of severe weather is crucial. One of the most important aspects of safeguarding your property is protecting the floor from water damage. Hurricane waterproofed floor are a key feature in hurricane-resistant homes, offering an effective solution to prevent water from infiltrating your living spaces and causing extensive damage.
This article explores what hurricane waterproofed floors are, the materials used, installation methods, and why they’re essential for hurricane-prone areas.
What is a Hurricane Waterproofed Floor?
A hurricane waterproofed floor is a specially designed floor system that prevents water from entering living spaces during heavy rainfall, floods, or storm surges. These floors are typically made from materials and constructed using methods that not only resist water penetration but also offer durability and flexibility under extreme weather conditions. In addition to their waterproof properties, these floors must also withstand the high winds and potential debris impact that hurricanes bring.
Key Features of Hurricane Waterproofed Floor
-
Water Resistance: The primary function of a hurricane waterproofed floor is to stop water from penetrating the surface. This is achieved through materials that create a barrier against water, ensuring that the floor does not absorb moisture.
-
Durability: Hurricane-resistant floors are made from durable materials that can withstand strong winds and debris impact. These materials can include reinforced concrete, vinyl, or rubber flooring systems, which can handle the physical stress of a storm.
-
Non-porous Surface: A crucial characteristic of waterproof flooring is its non-porous nature, meaning water cannot seep into the material. This is especially important in preventing mold growth and water damage.
-
Ease of Maintenance: Hurricane waterproofed floor are designed to be easy to clean and maintain, ensuring that after a storm, homeowners can quickly restore their homes to normal conditions without excessive cleaning efforts.
Materials Used in Hurricane Waterproofed Floor
-
Epoxy Coatings: Epoxy resin is a popular material for waterproofing floors. It creates a smooth, seamless surface that effectively resists water penetration. Epoxy coatings are particularly beneficial for concrete floors in areas prone to flooding.
-
Vinyl Flooring: Vinyl is an excellent material for waterproof floors due to its non-porous nature. It is often used in both residential and commercial settings, providing a durable and aesthetically pleasing option for hurricane-resistant homes.
-
Rubber Flooring: Rubber flooring offers both flexibility and water resistance. It is shock-absorbent and can handle the impact of debris while preventing water from seeping into the floor below.
-
Concrete Flooring: Concrete is naturally water-resistant and can be treated with special coatings to make it even more effective in waterproofing. Reinforced concrete floors are commonly used in hurricane-prone areas due to their strength and resilience.
-
Polyurethane Coatings: Polyurethane is another excellent option for creating a waterproof barrier. It offers protection against water while also enhancing the floor’s durability and lifespan.
Installation of Hurricane Waterproofed Floor
Installing hurricane waterproofed floors requires professional expertise to ensure that the floors meet safety standards. The installation process typically involves several steps:
-
Preparation: The existing floor must be thoroughly cleaned and prepped. If necessary, any old flooring may need to be removed to prepare the subfloor for waterproofing.
-
Application of Waterproofing Layer: Depending on the material used, the waterproofing layer is applied. For coatings, a primer is often used, followed by a water-resistant layer. For vinyl or rubber flooring, the pieces are cut and laid down to form a seamless, impermeable surface.
-
Sealing and Finishing: After the waterproofing material is applied, the floor is sealed and finished. This ensures that there are no gaps, seams, or cracks where water could potentially seep through.
-
Inspection: Once the installation is complete, the floor is inspected to confirm that it meets all necessary standards. This may involve checking for water-tight seals and ensuring the integrity of the surface.
Why Are Hurricane Waterproofed Floor Important?
In hurricane-prone regions, flooding is one of the most common and damaging effects of a storm. By installing hurricane waterproofed floors, homeowners can prevent water from infiltrating their living spaces, which can lead to costly damage and long-term structural issues. The benefits of these floors extend beyond water resistance:
- Protection Against Mold: Water damage can lead to mold growth, which can affect the health of the inhabitants. Waterproof floors help prevent this by keeping moisture out.
- Enhanced Structural Integrity: Water entering a home during a hurricane can weaken its foundation over time. By keeping the water out, the structural integrity of the home is preserved.
- Cost-Effective: Although the initial cost of installing hurricane waterproofed floor can be high, it can save homeowners significant money in the long run by preventing damage to the building and contents.
- Increased Property Value: Homes with hurricane-resistant features, including waterproofed floors, are more attractive to buyers in areas prone to storms, potentially increasing the property’s resale value.
Conclusion
Hurricane waterproofed floor provide an invaluable defense against the water and debris that accompany storms, particularly hurricanes. By choosing the right materials and ensuring professional installation, homeowners can safeguard their living spaces from water damage and the subsequent risks like mold growth and structural deterioration. In addition to providing peace of mind, these floors can be a cost-effective way to protect your home, preserve its value, and create a safe, dry environment during severe weather conditions.
Investing in hurricane-resistant features like waterproofed floors is essential for anyone living in a hurricane-prone region, ensuring that you and your home remain protected, no matter the storm.
FAQs
Q1: Are hurricane waterproofed floor suitable for all types of homes?
A1: Yes, hurricane waterproofed floor can be installed in a variety of homes, including those with concrete or wooden subfloors. The materials used can be adapted to fit different home styles and needs.
Q2: How much does it cost to install hurricane waterproofed floors?
A2: The cost of installation depends on the materials chosen and the size of the area being covered. Generally, it can range from $3 to $10 per square foot for materials, with installation fees adding to the total cost.
Q3: How long do hurricane waterproofed floors last?
A3: With proper installation and maintenance, hurricane waterproofed floors can last anywhere from 10 to 30 years, depending on the materials used and environmental factors.
Q4: Can I install hurricane waterproofed floors myself?
A4: While it is possible for a skilled DIYer to install some types of waterproof flooring (like vinyl), it’s recommended to hire professionals for a more permanent solution, particularly when dealing with coatings or concrete flooring.
Q5: Are hurricane waterproofed floors effective in all storms?
A5: While these floors are designed to withstand heavy rainfall, storm surges, and wind-driven rain, they are not entirely flood-proof in extreme cases. It’s important to combine waterproof floors with other storm preparation measures.
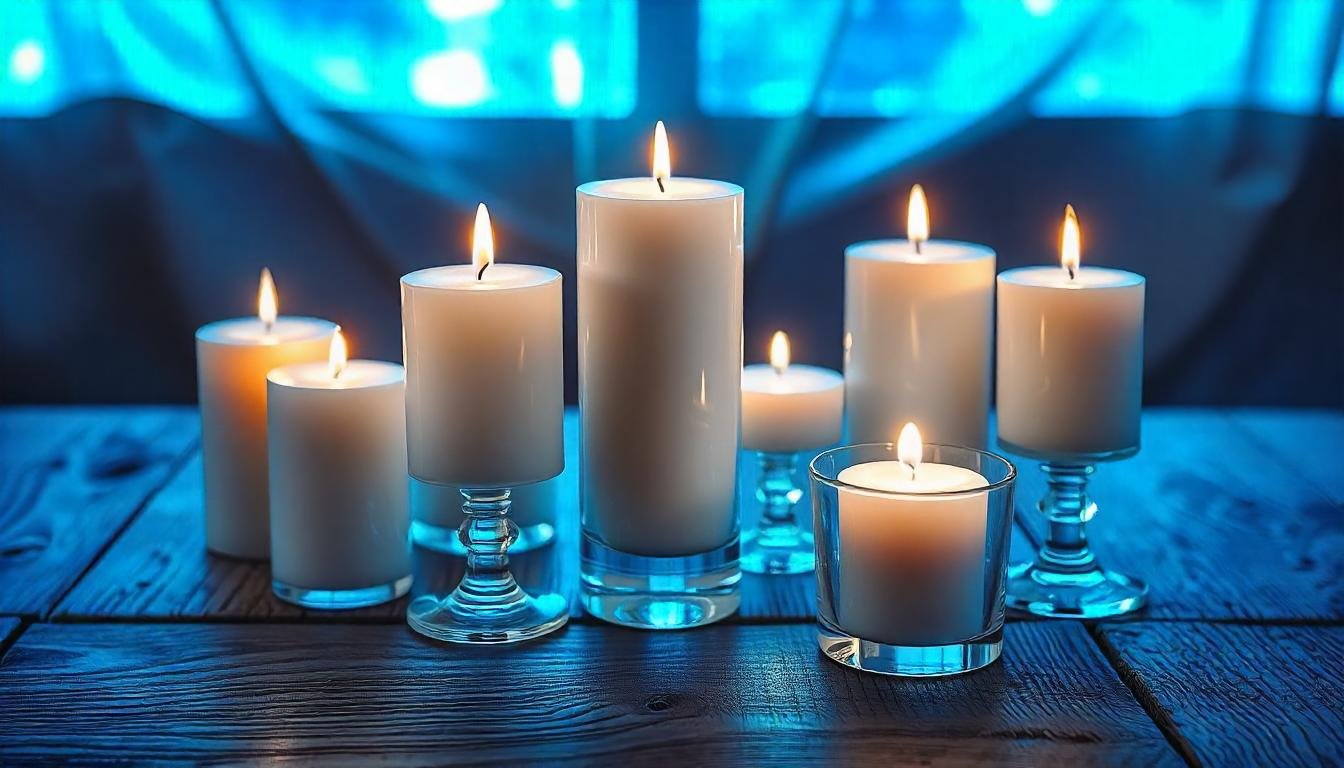
Candles have long been a source of comfort, light, and ambiance in our homes. But there’s something uniquely enchanting about sand candles—a creative twist on traditional candle-making that blends the warmth of a candle with the natural beauty of sand. Whether used as decorative pieces or for creating a relaxing atmosphere, sand candles offer endless possibilities for customization.
This article delves into the world of sand candles, from their history and benefits to how you can make your own at home. Let’s uncover the magic of sand candles and how they can brighten up your living space with a touch of creativity.
What Are Sand Candles?
Sand candles are candles made by encasing wax inside a mold that is created using sand. The sand is packed tightly into a container, and once the mold is set, molten wax is poured into the sand mold to form a candle. This unique process allows for creative and beautiful designs that can mimic the texture and look of natural, weathered sand. The result is a beautifully textured, eco-friendly, and often rustic-looking candle.
What sets sand candles apart from regular candles is their connection to nature. Sand, with its natural grains and earthy feel, pairs beautifully with the warm glow of a candle, creating an organic ambiance. Whether you’re crafting them for yourself, gifting them, or using them for home décor, sand candles offer a unique way to incorporate nature’s elements into your living space.
The Appeal of Sand Candles
There are several reasons why sand candles have gained popularity in recent years:
-
Natural and Eco-Friendly:
Sand candles are an eco-friendly alternative to traditional candles. Sand is an abundant and natural material that doesn’t require much processing, making it a sustainable choice for candle-making. Additionally, many sand candles are created using beeswax or soy wax, both of which are renewable resources, further enhancing the eco-friendliness of the craft. -
Creative and Customizable:
The process of making sand candles allows for plenty of creative expression. You can experiment with different molds, colors, and scents to create a candle that fits your unique style. From simple, minimalistic designs to more elaborate patterns and shapes, the possibilities are endless when it comes to creating sand candles. -
Aesthetic Appeal:
The texture and design of sand candle are what make them so visually striking. The grains of sand give the candle a rustic, beachy, or earthy look, making them perfect for home décor. They work well in a variety of settings, from coastal-themed homes to boho-chic interiors. The natural beauty of sand adds a unique touch to any space. -
Relaxing Ambiance:
Like all candles, sand candles create a soft, calming glow that enhances the mood of any room. Whether you’re using them during a dinner party or as part of a quiet meditation space, the warm light and natural texture of sand candles can help create a peaceful and serene environment.
How to Make Sand Candles: A Step-by-Step Guide
Making your own sand candles is a fun and easy craft project. Here’s a simple guide to help you get started:
Materials Needed:
- Sand (fine sand works best)
- Wax (beeswax, soy wax, or paraffin wax)
- Candle wick
- Candle dye or crayon shavings (optional, for color)
- Essential oils (optional, for scent)
- A container or mold (such as a glass jar or a small bucket)
- A double boiler (for melting wax)
- A stirrer or spoon
- Pencil or chopstick (to hold the wick in place)
Instructions:
Prepare the Sand Mold
Begin by preparing your sand mold. Find a container or mold that you would like your candle to be shaped like, such as a jar, glass cup, or small bucket. Pour the sand into the container, packing it tightly to ensure the wax will hold its shape. You can also create more elaborate designs by layering different colored sand or creating a pattern in the sand.
Melt the Wax
Using a double boiler, melt your wax over low to medium heat. Stir occasionally until the wax is fully melted and smooth. If you’d like to add color to your candle, this is the time to add candle dye or crayon shavings. You can also mix in essential oils to add a pleasant scent to your sand candles.
Insert the Wick
Before pouring the wax, make sure to secure the wick in place. Place the wick vertically in the center of your mold. Use a pencil or chopstick to tie the wick to it, keeping it taut and centered. You can also use a small amount of hot wax to secure the bottom of the wick to the sand.
Pour the Wax
Slowly pour the melted wax into the sand mold, ensuring it fills the entire mold while keeping the wick centered. Pour carefully to avoid disturbing the sand or the wick. Leave a small gap between the top of the wax and the top of the mold to allow for any additional topping or decoration.
Let the Wax Cool
Allow the wax to cool and harden completely. This can take a few hours depending on the size of the candle. You can place the mold in the refrigerator to speed up the cooling process.
Finish the Candle
Once the wax has hardened, trim the wick to about half an inch above the surface of the candle. Carefully remove the candle from the mold and gently shake off any excess sand. You can leave the sand around the edges for an added rustic touch, or clean it off for a smoother finish.
Enjoy Your Sand Candle
Light your new sand candle and enjoy the warm, flickering glow it brings to your space. You can experiment with different shapes, colors, and scents to create a variety of sand candle for different occasions and settings.
Creative Ideas for Sand Candle Designs
Sand candles can be customized to fit your personal style and the décor of your home. Here are a few ideas to inspire your next sand candle creation:
-
Beach-Inspired Candles
For a coastal or beach-themed room, use fine white sand and a simple jar or glass as a mold. You can add small seashells or pebbles to the sand for a beachy look. -
Layered Sand Candles
Create a visually stunning design by layering different colors of sand in your candle mold. You can create rainbow patterns, ombre effects, or even stripes for a bold look. -
Candle Centerpieces
Use large sand candles as the centerpiece of a table. Pair them with other natural elements like driftwood, flowers, or greenery to create a rustic, organic feel. -
Holiday Sand Candles
Sand candle can also be adapted for holiday themes. Use red and green sand for Christmas, or create candles in the shape of pumpkins for a fall or Halloween display. -
Scented Sand Candles
Add a relaxing touch to your sand candle by incorporating essential oils like lavender, vanilla, or eucalyptus. Scented candles can enhance the atmosphere of any room, making them perfect for unwinding after a long day.
Benefits of Using Sand Candles
Sand candles offer several benefits over traditional candles, making them a worthwhile addition to your home décor:
-
Eco-Friendly
Sand is a natural and sustainable material, and using eco-friendly wax such as beeswax or soy wax makes sand candles even more environmentally conscious. These candles are biodegradable, reducing their environmental impact once they burn down. -
Customizable
Because they are made from sand, you can create candles of different sizes, colors, and designs. Whether you prefer a minimalist design or an ornate decoration, sand candle can be tailored to your preferences. -
Unique Texture and Appearance
The texture of sand creates an appealing, rustic aesthetic that is hard to replicate with other types of candles. The look of sand candle adds warmth, earthiness, and sophistication to any room.
Conclusion
Sand candles are a creative, eco-friendly way to add a touch of nature to your home décor. Their unique texture, aesthetic appeal, and versatility make them an ideal choice for those looking to craft their own candles or incorporate them into a design project. Whether you’re looking for a relaxing addition to your home or a personalized gift, making sand candle can be an enjoyable and fulfilling craft. Experiment with different sand colors, scents, and molds to create your own masterpiece and bring the warm glow of sand candle into your living space.
FAQs
What are sand candles made of?
Sand candles are made by pouring molten wax into a mold created using sand. The sand helps form the shape and texture of the candle.
Can I use any type of sand for sand candle?
You can use any type of sand, but fine sand works best for creating a smooth and refined look. Coarse sand can also be used for a more rustic feel.
How do I make sand candle smell nice?
Add a few drops of essential oils or fragrance oils to the melted wax before pouring it into the mold. Popular scents include lavender, vanilla, and citrus.
Are sand candle environmentally friendly?
Yes, sand candle are environmentally friendly because they use natural materials like sand and eco-friendly waxes, such as beeswax or soy wax.
Can sand candle be reused?
While the sand itself can be reused, the wax in sand candle is typically not reusable once it has burned down. However, the container or mold can be cleaned and repurposed.
How long do sand candle burn?
The burn time of a sand candle depends on the amount of wax used and its size. Larger candles will burn longer, while smaller ones may burn for only a few hours.
-

 Technology2 weeks ago
internet chicks: A Digital Phenomenon
-

 Recipes9 months ago
Crab Brulee Recipe: A Gourmet Delight
-

 Recipes9 months ago
Smoothie CCL: A Delicious and Nutritious Trend
-

 FOOD2 weeks ago
Çeciir: A Journey Through Turkish Cuisine
-

 FOOD9 months ago
Cornflake Meringue Cookies
-

 FOOD9 months ago
Nasi Uduk
-

 Recipes9 months ago
The Ultimate Bug Juice Camp Drink Recipe for Fun and Flavor
-

 BLOGS9 months ago
Unveiling the Innovation: BoltBól – Revolutionizing Accessibility and Mobility