FOOD
A Flavor-Packed Dish to Start the Day: Celebrating Chilaquiles
Chilaquiles, a classic Mexican dish, has been an integral part of Mexican culture for centuries, offering an explosion of flavors with each bite. Whether enjoyed for breakfast, brunch, or even dinner, chilaquiles are the epitome of comfort food that satisfies cravings with every spoonful. Join us in celebrating chilaquiles, an unforgettable culinary experience that is cherished by locals and food enthusiasts worldwide.
The Rich History of Chilaquiles
Chilaquiles date back to the Aztec civilization, where corn played a central role in everyday meals. This dish’s main component, tortillas, is a symbol of the deep connection between Mexican culture and its food traditions. Chilaquiles evolved as a way to repurpose stale tortillas by frying them and bathing them in salsa, creating a sustainable and delicious meal.
Through the years, chilaquiles have grown beyond their humble origins, gaining recognition as a must-try dish for visitors to Mexico. It’s become a culinary icon, representing Mexican hospitality and culinary creativity.
What Makes Chilaquiles Special?
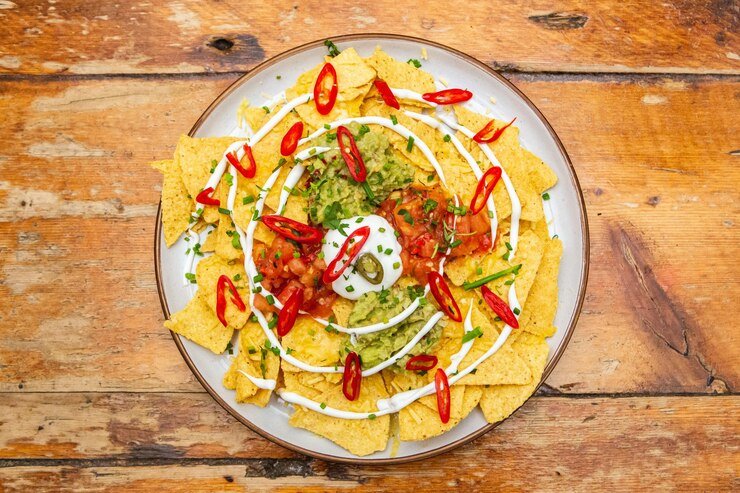
At its core, chilaquiles consist of fried tortilla pieces simmered in salsa and garnished with a variety of toppings like cheese, onions, cream, and avocado. The tortilla chips soak up the flavors of the sauce, creating a delightful contrast between crunchy and soft textures.
Key Elements of Chilaquiles:
- Tortilla Chips: Made from either corn or flour tortillas, lightly fried until golden and crisp.
- Salsa: The lifeblood of chilaquiles, salsa can be red (roja) or green (verde), depending on the use of tomatoes or tomatillos.
- Garnishes: Fresh ingredients like crema (Mexican sour cream), crumbled queso fresco, avocado, and cilantro take the dish to new heights.
Each bite offers a satisfying mix of flavors, from the acidity of the salsa to the creaminess of the cheese and the crunch of the tortillas.
Variations of Chilaquiles Across Mexico
Chilaquiles are a versatile dish, and depending on the region of Mexico, you might encounter different versions. The beauty of chilaquiles lies in their adaptability—each cook brings their unique touch, ensuring that no two plates are the same. Here are some popular variations:
Chilaquiles Verdes: In this variation, the tortillas are simmered in tangy tomatillo salsa, lending a bright green color to the dish. The tartness of the salsa verde is perfectly balanced with the richness of cream and cheese.
Chilaquiles Rojos: Made with a red salsa base, typically using tomatoes, onions, and dried chilies, chilaquiles rojos offer a heartier, spicier flavor compared to their green counterpart.
Chilaquiles with Eggs: For a protein-packed meal, chilaquiles are often served with fried or scrambled eggs on top. The eggs add a comforting, velvety texture that complements the crispy tortillas.
Chilaquiles with Chicken: Shredded chicken is a common addition, transforming the dish into a more filling and satisfying meal. This variation is popular for lunch or dinner, offering more substance while maintaining its traditional flavor profile.
How to Make the Perfect Plate of Chilaquiles at Home
If you’re eager to bring the flavors of Mexico into your kitchen, chilaquiles are the perfect dish to start with. Here’s a simple yet authentic recipe for making chilaquiles that captures the essence of this beloved dish.
Ingredients:
- 8-10 corn tortillas, cut into triangles
- 1 cup salsa verde or roja
- 1/2 cup crumbled queso fresco
- 1/4 cup Mexican crema
- 1 avocado, sliced
- 1/2 onion, thinly sliced
- Fresh cilantro, chopped
- Salt and pepper to taste
- Oil for frying
Instructions:
- Heat oil in a large pan over medium heat. Once hot, fry the tortilla triangles until they’re crisp and golden. Drain them on paper towels to remove excess oil.
- In the same pan, reduce the heat and pour in your chosen salsa. Allow it to simmer gently for a couple of minutes.
- Add the fried tortilla chips to the pan and toss them in the salsa, ensuring they are well-coated. Let them cook for 2-3 minutes to absorb the flavors, but avoid letting them become too soggy.
- Plate the chilaquiles and garnish with crumbled queso fresco, a drizzle of crema, sliced onions, avocado, and fresh cilantro.
- Serve immediately, and enjoy this Mexican masterpiece!
This recipe is just a foundation—you can customize it with your favorite toppings like eggs, chicken, or even steak to make it your own.
Chilaquiles: A Healthy Twist
Despite being known for its indulgence, you can make chilaquiles a nutritious option with a few simple swaps. For example, instead of frying the tortilla chips, bake them in the oven for a lower-fat version. You can also use Greek yogurt in place of crema for a protein boost, and pile on veggies like bell peppers or spinach for added vitamins and minerals.
Additionally, if you’re following a gluten-free or vegan diet, chilaquiles can easily be adapted by using gluten-free tortillas and dairy-free cheese substitutes. The beauty of this dish is how versatile it is, allowing for endless customization while still delivering mouthwatering flavors.
Celebrating Chilaquiles in Mexican Cuisine
Chilaquiles are more than just a dish—they embody the heart of Mexican cuisine. They tell a story of resourcefulness, tradition, and communal enjoyment. In Mexico, breakfast tables often overflow with platters of chilaquiles, surrounded by family and friends eager to dig in.
Their ability to be adapted for various palates, regions, and occasions makes chilaquiles a shining example of Mexican culinary diversity. Whether served in high-end restaurants or simple home kitchens, chilaquiles maintain their position as a cherished dish that resonates with both locals and tourists.
The Cultural Significance of Chilaquiles
In Mexican culture, food is a means of connection. Sharing a plate of chilaquiles with loved ones represents warmth, comfort, and the joy of being together. It’s a dish that sparks conversations, shared experiences, and memories of home-cooked meals. Chilaquiles also often appear on special occasions and celebrations, becoming a symbol of good times and festive moments.
Chilaquiles are particularly celebrated during brunch—a leisurely meal that blends the best of breakfast and lunch. Whether eaten with a group or solo, chilaquiles always promise a gratifying, soulful experience.
Why You Should Be Celebrating Chilaquiles
So why should you be celebrating chilaquiles? Simply put, it’s a dish that offers something for everyone. From its crunchy tortillas to the creamy toppings, chilaquiles strike the perfect balance between texture and flavor. They’re also incredibly versatile, giving you the freedom to experiment with ingredients and make the dish uniquely yours.
Moreover, chilaquiles are a testament to how food can transform into an art form. Their history, flavor complexity, and the cultural value attached to them make chilaquiles much more than just a meal—they’re a culinary tradition worth celebrating and savoring.
FAQs
What is the best time to eat chilaquiles? Chilaquiles are traditionally enjoyed as a breakfast or brunch dish, but they can be served at any time of day. Many people also enjoy them for dinner, especially when topped with chicken or eggs for a more substantial meal.
Can I make chilaquiles with store-bought tortilla chips? Yes, you can use store-bought tortilla chips to make chilaquiles, though homemade fried tortilla pieces often yield a better texture. If you opt for store-bought chips, choose thick ones that won’t get soggy too quickly.
Are chilaquiles spicy? The spiciness of chilaquiles depends on the type of salsa used. Green salsa (salsa verde) tends to be tangier, while red salsa (salsa roja) can range from mild to very spicy. You can adjust the heat level by selecting a salsa that fits your taste.
How long do chilaquiles last? Chilaquiles are best eaten fresh as the tortillas will continue to absorb the salsa and can become soggy. However, if you have leftovers, they can be stored in the refrigerator for up to 2 days. Reheat them gently, though the texture will soften over time.
What should I serve with chilaquiles? Chilaquiles are often served with a side of refried beans or Mexican rice. You can also pair them with fresh fruit or a simple salad for a balanced meal.
Can chilaquiles be made vegetarian or vegan? Absolutely! Chilaquiles can be easily adapted for vegetarian or vegan diets. Simply omit meat toppings like chicken and use vegan cheese and plant-based cream alternatives for a delicious vegan version.
Turkish cuisine, a rich tapestry of flavors, ingredients, and cooking techniques, is a culinary tradition that has been shaped by centuries of cultural exchanges and historical events. Çeciir, a term that embodies the essence of this cuisine, represents not just the food itself but the communal and familial experiences that come with it. This article explores the world of çeciir in Turkish cuisine, highlighting its origins, signature dishes, and the cultural significance that makes it so unique.
Origins and Historical Context
The roots of Turkish cuisine stretch back to the nomadic Turkic tribes of Central Asia, who brought with them a diverse range of culinary practices. As these tribes settled in Anatolia, their food culture was influenced by the region’s abundant agricultural products and the culinary traditions of neighboring civilizations. Over time, the Ottoman Empire further enriched Turkish cuisine by incorporating ingredients and techniques from the Middle East, the Balkans, and the Mediterranean.
Signature Dishes
- Kebabs: Turkish kebabs, such as Adana and Urfa, are famous worldwide. These skewered and grilled meats are seasoned with a blend of spices and often served with rice, bread, and fresh vegetables. The art of making kebabs has been perfected over centuries, with regional variations adding to their diversity.
- Mezes: A staple of Turkish dining, mezes are small, flavorful dishes served as appetizers or snacks. They include a variety of options such as hummus, baba ghanoush, dolmas (stuffed grape leaves), and sigara böreği (cheese-filled pastries). Mezes are designed for sharing, encouraging a communal dining experience.
- Pide and Lahmacun: Often referred to as Turkish pizza, pide is a boat-shaped flatbread topped with cheese, meats, and vegetables. Lahmacun, on the other hand, is a thin, crispy flatbread topped with minced meat, tomatoes, onions, and herbs. Both dishes are popular street foods and are loved for their simplicity and flavor.
- Baklava: This iconic Turkish dessert is made of layers of filo pastry filled with chopped nuts and sweetened with honey or syrup. Baklava is a symbol of celebration and is often enjoyed during festivals and special occasions.
- Manti: These tiny dumplings filled with spiced meat are traditionally served with a garlic yogurt sauce and drizzled with melted butter and paprika. Manti is a beloved comfort food in Turkish cuisine, often prepared for family gatherings.
Cultural Significance
The concept of çeciir in Turkish cuisine extends beyond the food itself to the social rituals and traditions surrounding it. Turkish meals are often communal affairs, bringing family and friends together to share in the bounty of the table. Hospitality is a cornerstone of Turkish culture, and offering food to guests is a deeply ingrained practice.
Turkish cuisine also reflects the country’s regional diversity. Each region has its own specialties and culinary techniques, contributing to a rich and varied food culture. For example, the Aegean region is known for its olive oil-based dishes and fresh vegetables, while the southeastern part of Turkey is famous for its spicy kebabs and hearty stews.
Conclusion
Çeciir in Turkish cuisine represents a harmonious blend of flavors, traditions, and social customs. It is a culinary journey that takes you through the history and culture of Turkey, offering a taste of the country’s rich heritage. Whether you’re enjoying a simple meze or indulging in a decadent piece of baklava, Turkish cuisine invites you to experience the warmth and hospitality that are at the heart of çeciir.

Mee Sedap, generally called Mie Sedaap in Indonesia, has been around beginning around 2003. This notable second noodle brand is the brainchild of WINGS Social occasion Indonesia, and they esteem using top notch trimmings and normal flavors, got together with a faultlessly changed planning itemizing. Mi Sedaap second noodles are available in 30 countries, including Malaysia and Singapore. Expecting you’ve perceived this brand on the walkways of your nearest store and are planning to look at it, read on as we uncover the really 3 Mi Sedaap flavors and proposition a couple of stimulating recipes that will take your second noodle experience to a more elevated level. Anything warm and tasty can offer a sense of delicacy to your tongue while making your mood swings subside. A bowl of chicken noodles ( Mie Sedap) is all you need to calm down and soothe your brain fibers. A good meal can always boost your serotonin because every delicious meal makes both your stomach and soul feel satisfied and good.
Is Mi Sedaap Safeguarded to Eat?
- Without a doubt, Mi Sedaap’s second noodles are safeguarded to eat! They meet different halal and sterilization rules, similar to the ISO 22000 Attestation for Worldwide Standards of Food dealing with The leaders and the ISO 9001 License for Overall Quality Organization System Standards.
- The ISO 22000 Attestation ensures that Mi Sedaap has completed measures to control sterilization risks, while the ISO 9001 Authentication guarantees that the affiliation has spread out compelling cycles and arranged their staff to dependably convey faultless things.
- With these endorsements set up, you can truly believe the security and nature of Mi Sedaap’s second noodles.
Best Mi Sedaap Flavors
In 2003, Mie Sedap made its show with 2 luscious flavor decisions: Mi Sedaap Goreng Asli and Mi Sedaap Soto. From there on out, they have stretched out their scope to integrate a varying assurance of flavors, going from singed noodles (goreng) to soups, offering a wide combination of Asian-stirred flavors to take extraordinary consideration of different tendencies.
Among their expansive goreng decision, our really 3 top picks are the Goreng Asli, Ayam Krispi, and Korean Hot Chicken. All of these flavors offer a fascinating and satisfying taste experience that makes us need to an ever increasing extent.
Mi Goreng Perisa Asli
The Mi Goreng Perisa Asli offers an excellent understanding of Mi Goreng (container burned noodles), updated by the great pound of their interesting Kriuk-Kriuk® seared onions. With an abundance of firm burned onions and thick, chewy noodles, this dish offers a superb surface that supplements the sweet, perfect and red hot notes of the dish.
If you should dial down on the force or add a smooth surface to the dish, top the noodles with a runny splendid side egg and join everything as one going before serving!
Mi Goreng Ayam Krispi
If you love burned chicken, the Mi Goreng Ayam Krispi might be most certainly right up your alley! The springy noodles gloat a tempting aroma and sort of seared chicken. Regardless, that isn’t all – even the crunchy Krezz-Krezz® cooked onion pieces are permeated with the brilliant taste of chicken, ensuring a truly satisfying encounter.
Mi Goreng Korean Searing Chicken
Mi Sedaap’s Korean Fiery Chicken flavor is the ideal choice for those in the disposition for a singing, mouth-watering experience and those expecting to begin to sweat while participating in a tasty banquet! The thick, springy noodles are planned to retain the red hot sauce, giving you a flavourful contribution in each snack.
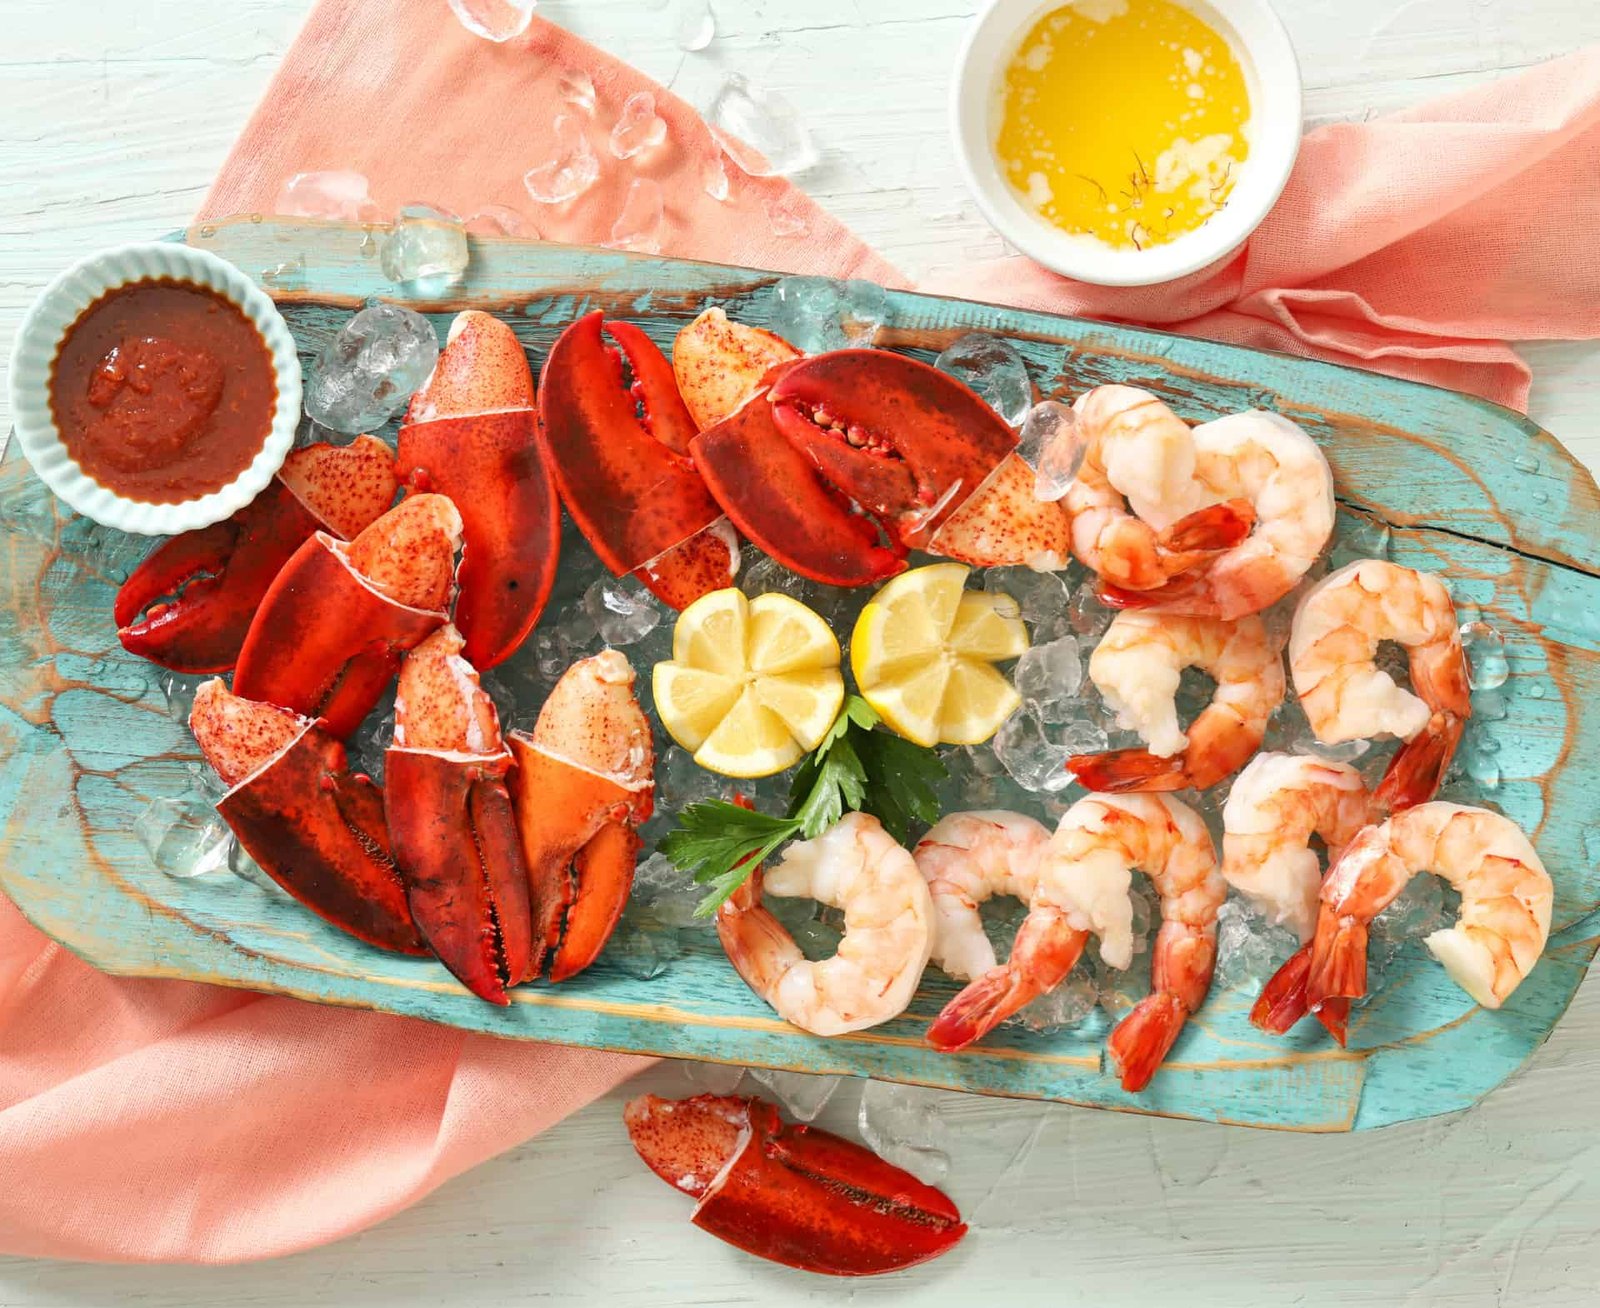
Lobster is special. It is a fancy food that makes any dish feel extra special. This holiday season, surprise your guests with appetizers made from fresh lobster. Lobster has a rich and sweet flavor. It makes meals taste amazing. Whether you are hosting a party or want to make your Christmas meal fancy, lobster can help. It makes appetizers delicious and memorable. Try making savory lobster rolls. Or make a lobster and crab mini frittatas. These recipes are easy to make and look fantastic. Your loved ones will talk about them for sure. So, let’s explore how to use lobster. Bring joy to your holiday table with these tasty appetizers!
7 Easy and Elegant Lobster Appetizer for your Holiday Gatherings
-
Lobster & Avocado Crostini
It perfectly balances creamy avocado and sweet, succulent lobster on crispy toast.
Ingredients:
- 1 fresh lobster tail, cooked and chopped
- 1 ripe avocado, mashed
- Lemon juice, to taste
- Salt & pepper
- Fresh parsley, chopped
- Baguette, sliced and toasted
Steps:
- In a bowl, mix the mashed avocado, lobster, lemon juice, salt, and pepper.
- Spread the mixture on each toasted baguette slice.
- Garnish with fresh parsley.
- Serve immediately for a light, refreshing bite.
-
Lobster Deviled Eggs
A twist on the classic deviled eggs, filled with the richness of lobster and creamy mustard mayo.
Ingredients:
- 4 boiled eggs, halved
- 1/2 cup lobster meat, finely chopped
- 2 tbsp mayo
- 1 tbsp Dijon mustard
- Lemon zest
- Paprika for garnish
Steps:
- Scoop out the yolks and mash them in a bowl.
- Mix with mayo, mustard, lemon zest, and chopped lobster.
- Pipe or spoon the mixture back into the egg whites.
- Garnish with paprika and serve chilled.
-
Lobster & Spinach Stuffed Mushrooms
Earthy mushrooms stuffed with a luscious lobster and spinach filling, baked to golden perfection.
Ingredients:
- 10 large mushrooms stems removed
- 1/2 cup lobster meat, chopped
- 1/2 cup spinach, sautéed and chopped
- 2 tbsp cream cheese
- 1/4 cup grated parmesan
- Salt and pepper
Steps:
- Preheat the oven to 375°F.
- Mix the lobster, spinach, cream cheese, and parmesan in a bowl. Season with salt and pepper.
- Stuff the mushrooms with the mixture and place on a baking sheet.
- Bake for 15-20 minutes, until golden and bubbly.
-
Lobster Rolls on Mini Brioche Buns
Sweet lobster served in soft, buttery brioche buns, perfect for a Christmas gathering.
Ingredients:
- 1 fresh lobster tail, cooked and chopped
- 2 tbsp mayo
- 1 tbsp lemon juice
- Fresh chives, chopped
- Mini brioche buns
- Salt and pepper to taste
Steps:
- Mix the lobster, mayo, lemon juice, and chives in a bowl. Season with salt and pepper.
- Lightly toast the mini brioche buns.
- Spoon the lobster mixture into the buns and serve as bite-sized delights.
-
Lobster-Coconut Ceviche
A tropical, refreshing ceviche with lobster and coconut that’s perfect for adding a fresh flair to your Christmas appetizer spread.
Ingredients:
- 1/2 lb fresh lobster meat, chopped
- 1/2 cup coconut milk
- 1 lime, juiced
- 1/2 cup diced cucumber
- 1 small red onion, finely chopped
- Fresh cilantro, chopped
- Salt and pepper
Steps:
- Combine the lobster, coconut milk, lime juice, cucumber, onion, and cilantro in a bowl.
- Season with salt and pepper.
- Let it sit in the fridge for at least 30 minutes to allow the flavors to meld.
- Serve chilled with tortilla chips for a refreshing holiday treat.
-
Lobster and Crab Mini Frittatas
Savory, fluffy, and packed with rich seafood flavors, these bite-sized frittatas are easy to make and look impressive on any table.
Ingredients:
- 4 large eggs
- 1/2 cup heavy cream
- 1/2 cup cooked lobster meat (chopped into small pieces)
- 1/2 cup lump crab meat (ensure it’s clean and shell-free)
- 1/4 cup shredded Parmesan cheese
- 1/4 cup sharp cheddar cheese (optional for extra flavor)
- 1 small shallot, finely chopped
- 1 clove garlic, minced
- 2 tablespoons fresh chives, finely chopped (plus extra for garnish)
- Salt and black pepper to taste
- 1 tablespoon olive oil or butter (for cooking shallots and garlic)
- Non-stick spray or butter (for greasing muffin tin)
Steps:
- Preheat your oven to 350°F (175°C). Grease a 12-cup muffin tin with olive oil or melted butter to ensure the frittatas won’t stick.
- Gently fold the lobster meat and crab meat together in a large bowl. Be careful not to break the pieces too much. Set aside.
- Whisk together the eggs, heavy cream (or milk), Parmesan cheese, garlic powder, and a pinch of salt and pepper in a large bowl. Add the fresh chives and red bell pepper (if using) to the mixture. Stir to combine.
- Spoon the lobster and crab mixture evenly into the muffin tin cups. Then, pour the egg mixture over the seafood until each muffin cup is filled but not overflowing.
- Place the muffin tin in the oven and bake for 15-18 minutes, until the frittatas are set in the center and lightly golden on top. A toothpick inserted into the center should come out clean.
- Once baked, allow the mini frittatas to cool for a few minutes before removing them from the muffin tin. Garnish with fresh parsley and serve warm.
Wrap-up
Lobster adds a luxurious and approachable twist to your holiday appetizers. It elevates the flavors of any gathering. You can prepare dishes like a classic lobster roll, stuffed mushrooms, or a lobster and crab mini frittatas. These dishes are easy and impressive. Lobster has a delicate sweetness. It is versatile, meaning it can be used in many different recipes. This makes lobster perfect for making the holiday season extra special. Dive in and let these simple and indulgent dishes bring the warmth of Christmas cheer to your table. Enjoy the love, the laughter, and, of course, the lobster!
-

 Technology2 weeks ago
internet chicks: A Digital Phenomenon
-

 Recipes9 months ago
Crab Brulee Recipe: A Gourmet Delight
-

 Recipes9 months ago
Smoothie CCL: A Delicious and Nutritious Trend
-

 FOOD2 weeks ago
Çeciir: A Journey Through Turkish Cuisine
-

 FOOD9 months ago
Cornflake Meringue Cookies
-
 FOOD9 months ago
Nasi Uduk
-

 Recipes9 months ago
The Ultimate Bug Juice Camp Drink Recipe for Fun and Flavor
-

 BLOGS9 months ago
Unveiling the Innovation: BoltBól – Revolutionizing Accessibility and Mobility