FOOD
Do coleslaw blends freeze well? The Art of Coleslaw.
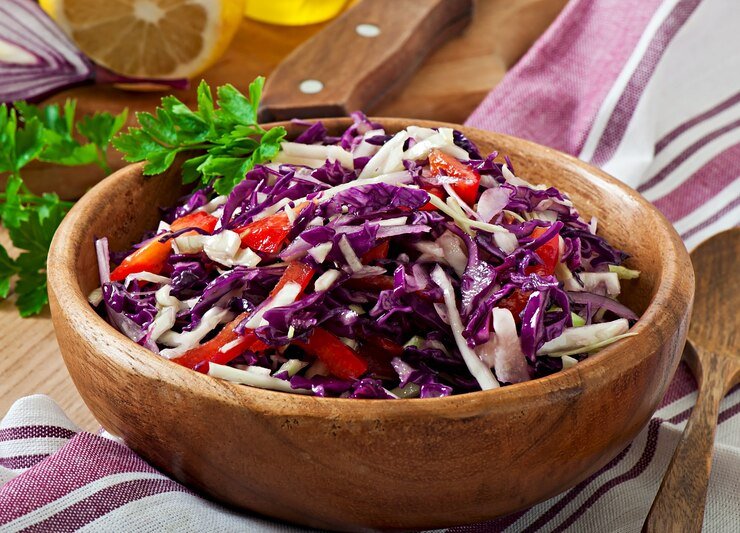
Do coleslaw blends freeze well? All of you find the answer of this question, but first, we explore the origins and traditions of coleslaw.
Coleslaw is more than just a side dish; it’s a culinary tradition that adds a refreshing, crunchy contrast to rich, savory meals. Whether it’s piled high on a pulled pork sandwich, served alongside fried chicken, or offered as a fresh accompaniment to grilled fish, coleslaw’s versatility makes it a favorite in kitchens worldwide.
The Origins of Coleslaw
The term “coleslaw” is derived from the Dutch word “koolsla,” where “kool” means cabbage and “sla” is short for salad. The dish traces its origins back to ancient Rome, where recipes for raw cabbage dressed with vinegar, eggs, and other spices were common. However, it wasn’t until the dish made its way to the United States, brought by Dutch settlers, that it began to take on the characteristics we associate with coleslaw today.
The Classic Coleslaw Recipe
At its core, coleslaw is a simple dish, traditionally made from finely shredded raw cabbage and dressed most commonly with a vinaigrette or mayonnaise-based dressing. Here’s a classic coleslaw recipe that remains a staple in many households:
Ingredients:
- 1 medium head of green cabbage, shredded
- 2 large carrots, peeled and shredded
- 1/2 cup mayonnaise
- 1/4 cup apple cider vinegar
- 2 tablespoons sugar (or honey for a natural sweetness)
- 1 teaspoon Dijon mustard
- Salt and pepper to taste
Instructions:
- In a large bowl, combine the shredded cabbage and carrots.
- In a separate small bowl, whisk together the mayonnaise, apple cider vinegar, sugar, Dijon mustard, salt, and pepper until smooth.
- Pour the dressing over the cabbage and carrots, tossing well to coat.
- Cover and refrigerate for at least an hour before serving to allow the flavors to meld together.
- Serve chilled as a side dish or as a topping for sandwiches and burgers.
Do coleslaw blends freeze well?
Coleslaw blends typically do not freeze well, especially those that include a mayonnaise-based dressing. Freezing can cause the cabbage and other vegetables to become soggy, watery, and lose their crisp texture. Mayonnaise-based dressings can also separate when frozen, leading to an undesirable consistency when thawed.
However, if you want to freeze coleslaw, it’s best to freeze only the shredded vegetables without the dressing. Once thawed, you can mix in a fresh dressing just before serving. Vinegar-based coleslaw or those with an oil-based dressing might freeze slightly better, but even these can suffer from texture changes.
If you do decide to freeze coleslaw, here are a few tips:
- Drain Excess Moisture: After thawing, drain any excess liquid to improve the texture.
- Use Airtight Containers: Proper storage in airtight containers can help preserve the quality as much as possible.
- Freeze in Small Batches: This makes thawing easier and quicker, helping to maintain the texture better.
For the best results, though, coleslaw is typically best enjoyed fresh.
FAQs About Coleslaw
1. What is coleslaw made of?
Coleslaw typically consists of shredded cabbage and carrots, mixed with a dressing. The dressing can be mayonnaise-based, vinegar-based, or a combination of both, depending on the recipe. Additional ingredients like onions, celery, bell peppers, or apples can also be added for extra flavor and texture.
2. How long does coleslaw last in the fridge?
Coleslaw can last 3 to 5 days in the refrigerator when stored in an airtight container. However, its freshness and quality are best within the first couple of days.
3. Can I freeze coleslaw?
While it’s possible to freeze coleslaw, it’s generally not recommended, especially if it contains a mayonnaise-based dressing. Freezing can cause the vegetables to become soggy and the dressing to separate. If you do freeze it, freeze the vegetables separately and add the dressing after thawing.
4. How can I prevent coleslaw from becoming watery?
To reduce the likelihood of watery coleslaw, salt the shredded cabbage before mixing it with the dressing. Allow it to sit for about an hour, then drain off any excess liquid before combining it with other ingredients. This process helps draw out excess moisture from the cabbage.
5. Is coleslaw healthy?
Coleslaw can be a healthy side dish, especially when made with a vinegar-based dressing rather than a mayonnaise-based one. Cabbage is rich in vitamins C and K, fiber, and antioxidants. The healthiness of coleslaw depends on the ingredients used in the dressing.
6. Can I make coleslaw ahead of time?
Yes, coleslaw can be made ahead of time. In fact, making it a few hours in advance allows the flavors to meld together. However, if you prepare it too far in advance, it may become soggy. For best results, make it no more than a day before serving.
7. What are some variations of coleslaw?
Coleslaw can be customized in many ways. Some popular variations include:
- Asian Coleslaw: Uses ingredients like soy sauce, sesame oil, and ginger.
- Apple Coleslaw: Adds shredded apples for sweetness.
- Spicy Coleslaw: Incorporates ingredients like jalapeños or hot sauce for a kick.
- Vegan Coleslaw: Uses a dairy-free, egg-free dressing.
8. What can I serve with coleslaw?
Coleslaw pairs well with a wide variety of dishes, particularly those that are rich or savory. It’s commonly served with barbecue, fried chicken, sandwiches, burgers, and grilled seafood. It also works well as a topping for tacos or as a filling for wraps.
9. Can I make coleslaw without mayonnaise?
Yes, coleslaw can be made without mayonnaise. Vinegar-based dressings are a popular alternative and provide a tangy flavor. You can also use Greek yogurt, sour cream, or a combination of olive oil and lemon juice as a substitute for mayonnaise.
10. What’s the best cabbage to use for coleslaw?
Green cabbage is the most commonly used variety for coleslaw, but you can also use red cabbage or a mix of both for a colorful presentation. Napa cabbage or Savoy cabbage can also be used for a different texture and flavor.

Orangîa, an exotic and lesser-known fruit, has recently captured attention worldwide for its unique taste, vibrant appearance, and numerous health benefits. Packed with nutrients and versatile in use, Orange has become a favorite among health enthusiasts and culinary experts alike.
In this article, we will explore everything about Orangîa, from its origins and nutritional value to its uses and incredible benefits.
What is Orangîa?
Orangîa is a citrus-like fruit renowned for its tangy sweetness and distinct aroma. It resembles an orange but boasts unique properties that set it apart. Native to tropical and subtropical regions, Orange thrives in warm climates, making it a staple in countries with abundant sunshine. Its vibrant orange skin, juicy pulp, and aromatic zest make it both a visual and culinary delight.
Nutritional Value of Orangîa
Orangîa is a powerhouse of essential nutrients. Here’s a breakdown of its key components:
| Nutrient | Amount per 100g | Health Benefits |
|---|---|---|
| Vitamin C | 53mg | Boosts immunity, promotes healthy skin |
| Dietary Fiber | 2.4g | Aids digestion, prevents constipation |
| Antioxidants | High | Fights free radicals, reduces inflammation |
| Natural Sugars | 9g | Provides energy without artificial additives |
| Potassium | 200mg | Maintains healthy blood pressure |
Orangîa also contains trace amounts of calcium, magnesium, and B vitamins, all contributing to its status as a nutritional gem.
Health Benefits of Orangîa
Boosts Immune Function
Thanks to its high Vitamin C content, Orangîa strengthens the immune system, making it an excellent ally against colds and infections. Consuming it regularly can help your body ward off common illnesses.
Improves Skin Health
The antioxidants and Vitamin C in Orangîa work together to promote collagen production, reducing wrinkles and giving your skin a youthful glow.
Supports Digestive Health
Rich in fiber, Orangîa aids digestion by promoting healthy gut bacteria and preventing issues like constipation.
Reduces Inflammation
Orangîa’s anti-inflammatory properties help alleviate symptoms of chronic conditions such as arthritis, asthma, and cardiovascular diseases.
Enhances Mental Clarity
Potassium and antioxidants found in Orangîa improve blood circulation, which in turn enhances brain function, focus, and mental clarity.
Culinary Uses of Orangîa with Recipes
Orangîa is a versatile ingredient in many recipes. Its zest, pulp, and juice are commonly used in:
- Smoothies: Add Orangîa juice for a refreshing twist.
- Desserts: Use its zest in cakes, cookies, and tarts.
- Salads: Sprinkle slices of Orangîa over fresh greens for a tangy burst.
- Sauces: Create citrus-based marinades for meats and seafood.
- Drinks: Mix it into cocktails or infuse water for a healthy beverage.
Below, discover the best ways to incorporate Orange into your meals, with easy-to-follow recipes that showcase its unique qualities.
1. Refreshing Smoothie
Ingredients:
- 1 cup freshly squeezed Orangîa juice
- 1 banana
- ½ cup Greek yogurt
- 1 tablespoon honey (optional)
- ½ cup ice cubes
Instructions:
- Blend all ingredients until smooth.
- Pour into a glass and garnish with an Orangîa slice.
- Serve chilled and enjoy this vitamin-packed drink!
Tip: Add a handful of spinach or kale for a nutrient boost.
2. Orangîa-Glazed Chicken
Ingredients:
- 4 chicken breasts
- ½ cup Orange juice
- 2 tablespoons Orange zest
- 3 tablespoons honey
- 2 tablespoons soy sauce
- 1 clove garlic, minced
- 1 teaspoon cornstarch
Instructions:
- Preheat your oven to 375°F (190°C).
- In a bowl, mix Orangîa juice, zest, honey, soy sauce, and garlic.
- Marinate the chicken breasts in the mixture for 30 minutes.
- Bake the chicken in the oven for 20 minutes.
- Transfer the marinade to a saucepan, add cornstarch, and simmer until thickened.
- Brush the glaze over the chicken and serve with steamed vegetables or rice.
Tip: For a spicier twist, add chili flakes to the marinade.
3. Orangîa Citrus Salad
Ingredients:
- 2 cups mixed greens (arugula, spinach, kale)
- 1 Orange, peeled and segmented
- ½ avocado, sliced
- ¼ cup crumbled feta cheese
- 2 tablespoons sliced almonds, toasted
- 3 tablespoons Orange vinaigrette (recipe below)
Instructions:
- Toss mixed greens, Orange segments, avocado, and feta cheese in a large bowl.
- Drizzle with Orangîa vinaigrette and sprinkle with toasted almonds.
4. Zesty Orangîa Cake
Ingredients:
- 2 cups all-purpose flour
- 1 ½ teaspoons baking powder
- 1 cup sugar
- ½ cup butter, softened
- 2 eggs
- ½ cup Orangîa juice
- 1 tablespoon Orange zest
Instructions:
- Preheat oven to 350°F (175°C) and grease a 9-inch cake pan.
- In a bowl, mix flour and baking powder.
- In a separate bowl, cream butter and sugar until fluffy. Add eggs one at a time.
- Slowly mix in Orangîa juice and zest, alternating with the dry ingredients.
- Pour batter into the prepared pan and bake for 30–35 minutes.
- Allow to cool, then sprinkle with powdered sugar or drizzle with Orange glaze.
5. Tangy Orangîa Marmalade
Ingredients:
- 4 Orangîa fruits
- 2 cups sugar
- 1 cup water
Instructions:
- Peel Orange, removing as much pith as possible. Slice the peel thinly.
- Chop the Orange pulp and discard seeds.
- In a pot, combine pulp, peel, water, and sugar. Bring to a boil, then simmer for 45 minutes, stirring occasionally.
- Pour into sterilized jars and let cool. Store in the refrigerator.
Serving Suggestions: Spread on toast, use as a filling for pastries, or pair with cheese.
6. Orangîa-Infused Water
Ingredients:
- 1 Orange, sliced
- 1 lemon, sliced
- 1 sprig fresh mint
- 1 liter of water
Instructions:
- Add all ingredients to a pitcher.
- Refrigerate for 2–4 hours to let the flavors infuse.
- Serve cold for a refreshing, hydrating drink.
Tip: Replace water with sparkling water for a bubbly twist.
7. Orangîa Sorbet
Ingredients:
- 2 cups Orangîa juice
- 1 tablespoon Orange zest
- ½ cup sugar
- ¼ cup water
Instructions:
- Dissolve sugar in water over low heat to create a simple syrup.
- Mix Orangîa juice and zest into the syrup.
- Pour into a shallow container and freeze, stirring every hour for a smooth texture.
- Scoop into bowls and garnish with mint leaves before serving.
Growing Orangîa at Home
If you live in a warm climate, growing Orange can be a rewarding experience. Here are some tips:
- Planting: Use well-drained soil and ensure plenty of sunlight.
- Watering: Keep the soil moist but avoid overwatering.
- Fertilizing: Feed with a citrus-specific fertilizer to promote growth.
- Pruning: Trim regularly to encourage healthy fruit production.
How to Incorporate Orange into Your Diet
Adding it to your daily meals is simple and beneficial. Here are some easy ways:
- Start your morning with a glass of fresh juice.
- Snack on Orange slices for a midday energy boost.
- Use Orange zest as a garnish for savory and sweet dishes.
Environmental Impact of Orangîa
Cultivating Orangîa sustainably can positively impact the environment. When grown organically, it reduces pesticide use, conserves soil health, and promotes biodiversity. Supporting local farmers who grow Orange using eco-friendly methods helps build a greener planet.
Conclusion
Orangîa is more than just a fruit—it’s a symbol of vitality and health. Whether you’re savoring its juicy pulp, enjoying its zest in a dessert, or harnessing its nutrients for skincare, Orange offers endless possibilities. By embracing this vibrant fruit, you’re not only enriching your diet but also supporting sustainable agriculture and wellness.
FAQs
What is Orangîa, and how does it differ from oranges?
Orangîa is a citrus-like fruit with a distinct tangy-sweet flavor. Unlike oranges, it has a slightly richer aroma and higher antioxidant content.
Can Orangehelp with weight loss?
Yes, Orange is low in calories and high in fiber, making it a great addition to weight-loss diets.
How do I store Orange?
Store Orange in a cool, dry place or refrigerate it to keep it fresh for longer.
Is Orange safe for children?
Absolutely! Orange is a nutritious snack for kids, providing them with essential vitamins and natural energy.
Are there any side effects of consuming Orange?
Orange is generally safe but should be consumed in moderation. Overeating may cause acidity in sensitive individuals.
Can Orange be used in skincare routines?
Yes, Orangîe Vitamin C and antioxidants make it a popular ingredient in natural skincare remedies.

The most important part of any occasion in Singapore is the food. When you’re putting together a corporate function, a marriage, or a simple backyard birthday party, the kind and quality of comestibles you serve can make or break the event. That puts an awfully lot of pressure on people who do the cooking because you want the worthies and the wooed to have a good time. And you want them to have a good time, in part, because it’s good food. That and the next few paragraphs are more or less the story of why catering became a profession in Singapore.
Catering Services: Their Function and Duties
Anyone looking to host an event can benefit greatly from the services provided by catering companies. Let us handle the food while you focus on other aspects of your event. Our wide range of options allows you to put your culinary concerns behind you, while we serve our expertly prepared meals to your guests. The team at EAT Catering is laden with chefs and serving staff that have considerable experience in a multitude of cuisines. EAT takes pride in offering a wonderfully extensive menu, with a considerable amount of items served that reflect Singapore’s culinary identity. In fact, part of EAT’s mission is to serve food that embodies the flavours of this incredible multicultural city-state.
Diversity and Personalisation
One of the biggest benefits of using catering services in Singapore is the huge variety they offer. Catering companies can provide everything from canapés and buffet meals to sit-down dinners and dessert tables. They are well-versed in satisfying a multitude of dietary demands—whether the result of allergies, religious beliefs, or individual decisions. When working with a catering company, you can have an in-depth conversation about your vision and thoroughly customise the menu to suit your event. For instance, if the bulk of your guest list is vegetarian, your caterer can create a menu to please meat-shy palates that features plenty of hearty, satisfying, and not-at-all bland dishes. Additionally, with catering services in Singapore, you can easily accommodate those who require special menus.
Planning Without Stress
Overseeing an event can be a lot to handle, especially when it comes to managing food logistics. Alleviating much of this pressure can be found in hiring professional catering services in Singapore. Not only do they prepare the food, but they also handle the setup, serving, and cleanup, which allows the host to enjoy the event and mingle with the guests—something that’s very necessary and very easy to overlook when you are the one being hosted. A good catering service knows how to coordinate the food and its timing so that everything comes out both on time and at the proper temperature. This is crucial when you’re managing a very large and diverse group as it keeps the atmosphere pleasant, with everyone relishing their time without worrying about when or how the food will be served.
Crafting Unforgettable Experiences
The event’s spotlight is often on the food, and catering can take this experience to a new level. Guests might not remember much about an event a few weeks later, but they’re almost certain to remember the meal’s quality. When a meal is not just eaten but truly enjoyed, it’s almost guaranteed to be a highlight of any event. That’s where catering comes into play and can elevate your event beyond just good to something potentially great, to where your guests will definitely talk about it long after. When you consider catering, you’re also almost assuredly thinking about the visual aspect of an event.
To summarise, using catering services located in Singapore can turn your event into a remarkable occasion. Their know-how allows you to serve not just a singular kind of food but a variety that suits your guests’ different palates, all the while taking the load of cooking (and serving) off your shoulders. And if any of you reading this are considering catering as an option for your next get-together, be it large or small, do yourself a favour and book these professionals. Your guests will rave about the meal long after your gathering has ended.

Polkadot gummies have gained attention for their innovative blend of ingredients that promise unique effects, particularly in the wellness and Nootropics spheres. Infused with specific mushroom extracts and sometimes other beneficial compounds, Polka dot gummies are crafted to support mental clarity, relaxation, and other desired effects.
In this article, we’ll examine the ingredients that make up Polkadot gummies, their potential benefits, and why these gummies are captivating the wellness market.
What Are Polkadot Gummies?
Polkadot gummies are a type of edible that often contain mushroom extracts or similar natural ingredients known for their cognitive and calming properties. Unlike traditional gummies, Polka dot gummies are typically targeted at users seeking enhanced focus, stress relief, or mood stabilization. They are crafted to look and taste like regular candy while delivering a range of wellness benefits, making them a discreet and enjoyable option.
The Unique Ingredients in Polkadot Gummies
The core appeal of Polkadot gummies lies in their innovative ingredient blend, which combines various wellness components. Here are some of the key ingredients often found in Polka dot gummies:
Mushroom Extracts
Commonly, Polkadot gummies contain mushroom extracts like Lion’s Mane, Reishi, or Cordyceps, which are believed to support mental clarity, immune function, and physical energy.
Natural Sweeteners
To enhance flavor without added sugars, Polka dot gummies often use natural sweeteners like stevia, monk fruit, or organic agave syrup.
Pectin or Gelatin
These ingredients give gummies their chewable consistency. Many brands opt for pectin, a plant-based gelling agent, making the gummies suitable for vegan diets.
Natural Flavoring
Flavorful fruit extracts or natural flavor enhancers are used to create a variety of delicious options without artificial additives.
Adaptogens
Some Polkadot gummies may include adaptogens, such as ashwagandha or Rhodiola, which are known for helping the body manage stress.
Functional Herbs and Botanicals
Ingredients like chamomile, lemon balm, or green tea extract are sometimes added to enhance relaxation and mood benefits.
Key Ingredients in Polkadot Gummies
The specific formulation of polka dot gummies can vary by brand and product, but several common ingredients are frequently found in these delightful treats:
1. Gelatin
Gelatin is a key component that gives gummies their chewy texture. It is derived from collagen, a natural protein found in animal connective tissues. For vegetarian or vegan options, alternatives like pectin or agar-agar are used to achieve a similar texture.
2. Sweeteners
To enhance the flavor, polka dot gummies often contain sweeteners. These can be natural sugars (like cane sugar or corn syrup) or sugar substitutes (such as stevia or erythritol) for those looking to reduce calorie intake. The choice of sweetener can significantly affect the overall taste and health profile of the gummies.
3. Flavorings
Natural and artificial flavorings are added to give polkadot gummies their appealing taste. Common flavors include fruit varieties like strawberry, cherry, and orange. Natural flavorings are derived from real fruit extracts, while artificial flavorings are synthesized to mimic these tastes.
4. Coloring Agents
The vibrant colors that make polka dot gummies visually appealing come from coloring agents. These can be natural (such as beet juice or turmeric) or synthetic dyes. Consumers often prefer products that use natural coloring agents due to health concerns associated with certain artificial dyes.
5. Vitamins and Minerals
Many polka dot gummies are fortified with essential vitamins and minerals. Common additions include:
- Vitamin C: Supports the immune system and acts as an antioxidant.
- Vitamin D: Promotes bone health and aids calcium absorption.
- B Vitamins: Essential for energy metabolism and overall well-being.
- Zinc: Important for immune function and cellular metabolism.
6. Functional Ingredients
Some polkadot gummies may also include additional functional ingredients aimed at specific health benefits, such as:
- Omega-3 Fatty Acids: For heart and brain health.
- Probiotics: To support gut health.
- Herbal Extracts: Like elderberry for immune support or melatonin for sleep aid.
Are Polkadot Gummies Vegan?
Many Polkadot gummies are made vegan by using pectin instead of gelatin. Pectin, derived from fruits, provides the same chewy texture as gelatin but is plant-based, making it suitable for a broader audience. By using vegan-friendly ingredients, brands are able to make their gummies accessible to those following plant-based diets.
How Are Polkadot Gummies Used?
Polkadot gummies are typically consumed as you would any edible treat, though users should follow recommended dosages. The effects of these gummies depend on the concentration of ingredients like mushroom extracts or adaptogens and can vary from promoting relaxation to boosting energy and focus. It’s generally advised to start with a lower dosage to gauge individual tolerance, especially for products containing potent natural extracts.
Why Are Mushrooms Used in Polkadot Gummies?
Mushrooms have gained popularity in the wellness industry for their unique health benefits. By incorporating mushroom extracts, Polka dot gummies provide users with cognitive and immune support in an easy-to-consume form. Additionally, mushrooms like Lion’s Mane and Reishi are known to have adaptogenic properties, helping the body adapt to stress and supporting overall health.
Are There Any Side Effects of Polkadot Gummies?
Most of the ingredients in Polkadot gummies, like mushrooms and adaptogens, are considered safe for consumption. However, individuals with sensitivities or allergies should carefully check ingredient lists. It’s also advisable to consult a healthcare provider before using products containing mushroom extracts or adaptogens if you’re pregnant, nursing, or on medication, as some extracts can interact with prescription drugs.
The Popularity of Polkadot Gummies in the Wellness Market
Polkadot gummies are part of a broader trend of functional foods and supplements aimed at enhancing cognitive and physical well-being. They’re popular among individuals looking for natural alternatives to boost focus, energy, or relaxation. By delivering these benefits in a convenient, enjoyable format, Polka dot gummies make it easy for users to incorporate wellness-boosting ingredients into their daily routines.
Polkadot Gummies and Sustainability
Many brands producing Polka dot gummies focus on sustainable ingredient sourcing, ensuring that mushrooms and other components are cultivated with minimal environmental impact. Additionally, some brands use eco-friendly packaging, appealing to health-conscious consumers who value wellness and environmental responsibility.
Conclusion
Polkadot gummies offer a unique, natural way to support mental clarity, stress relief, and energy through their carefully selected ingredients. Combining the benefits of mushroom extracts, adaptogens, and natural flavorings, these gummies provide a modern approach to wellness in a convenient and enjoyable form.
FAQs
What is the main benefit of Lion’s Mane mushroom in Polkadot gummies?
Lion’s Mane mushroom supports cognitive function, improving focus, clarity, and memory, making it a valuable ingredient in these gummies.
Are Polkadot gummies safe for daily consumption?
Yes, in recommended doses, Polka dot gummies are safe for most people. However, it’s best to consult a healthcare provider, especially if you have any health conditions.
Do Polkadot gummies contain caffeine?
While Polka dot gummies don’t usually contain caffeine, some may include energy-boosting herbs like green tea extract, so it’s essential to check the ingredients list.
Are Polka dot gummies suitable for children?
These gummies are typically designed for adults due to their potent ingredients, especially adaptogens and mushroom extracts. Please consult a healthcare provider before giving them to children.
What flavors are Polka dot gummies available in?
Polka dot gummies come in various natural flavors, including berry, citrus, and tropical fruit, making them enjoyable and easy to incorporate into daily routines.
Can I use Polka dot gummies for stress relief?
Yes, Polka dot gummies containing Reishi or Ashwagandha are often formulated to help reduce stress and promote relaxation.
-

 Technology3 months ago
internet chicks: A Digital Phenomenon
-

 Recipes4 months ago
Smoothie CCL: A Delicious and Nutritious Trend
-

 FOOD4 months ago
Nasi Uduk
-

 Recipes4 months ago
The Ultimate Bug Juice Camp Drink Recipe for Fun and Flavor
-

 Recipes4 months ago
Crab Brulee Recipe: A Gourmet Delight
-

 BLOGS4 months ago
Unveiling the Innovation: BoltBól – Revolutionizing Accessibility and Mobility
-

 FOOD4 months ago
Cornflake Meringue Cookies
-

 FOOD4 months ago
Çeciir: A Journey Through Turkish Cuisine