.
Connect with us

FOOD

Best hamburger temperature

Published

on

Best hamburger temperature

When it comes to crafting the perfect hamburger, temperature is more crucial than you might think. It influences flavor, texture, and, importantly, food safety. Whether you’re grilling in the backyard or preparing a meal in your kitchen, understanding hamburger temperature is key to a delicious and safe dining experience. Let’s dive into why temperature matters and how to get it just right.

What is a Hamburger?

A hamburger is a popular sandwich that typically consists of a cooked ground beef patty placed inside a sliced bun. Originating from the United States, the hamburger has become a staple in many countries due to its deliciousness and versatility. The basic hamburger includes the beef patty, bun, and often basic toppings such as lettuce, tomato, onions, and pickles. It can be customized with various condiments and additional ingredients to suit personal tastes.

1. Why Hamburger Temperature Matters

 The Impact on Flavor and Texture
Cooking hamburger to the right temperature affects their juiciness and tenderness. Too rare and you might end up with an undercooked patty; too well-done and it could become dry and tough.

 Ensuring Food Safety
Ground beef is prone to bacterial contamination, and cooking it to the correct temperature is essential for eliminating harmful pathogens such as E. coli and Salmonella.

2. The Right Temperature for Different Levels of Doneness

Rare
A rare burger is cooked to an internal temperature of 120°F (49°C). It will be very red inside and slightly cool. This level is often not recommended due to safety concerns, especially if you’re using ground beef.

Medium-Rare
For a medium-rare burger, aim for 130°F (54°C). This will give you a warm, red center with juices still flowing. It’s a popular choice for those who enjoy a more tender and juicy patty.

Medium
A medium burger is cooked to an internal temperature of 140°F (60°C). It will be pink in the center and firm to the touch. This is often considered the optimal balance between safety and juiciness.

Medium-Well
At 150°F (66°C), a medium-well burger will have only a slight hint of pink. It’s firmer and less juicy but still maintains some moisture.

Well-Done
For a well-done burger, cook to 160°F (71°C). The patty will be fully cooked with no pink remaining and a firmer texture. This is the safest option but can often be dry.

Easy Hamburger Recipe

Making a hamburger at home is simple and allows you to tailor the burger to your preferences. Here’s a straightforward recipe to get you started:

Ingredients:

  • 1 pound (450 grams) of ground beef (80% lean, 20% fat for juiciness)
  • 1 teaspoon salt
  • 1/2 teaspoon black pepper
  • 4 hamburger buns
  • Optional: cheese slices (American, cheddar, etc.)
  • Optional toppings: lettuce, tomato, onion, pickles
  • Optional condiments: ketchup, mustard, mayonnaise

Instructions:

  1. Prepare the Beef:
    • In a bowl, gently mix the ground beef with salt and black pepper. Avoid overmixing to keep the patties tender.
  2. Form the Patties:
    • Divide the meat into 4 equal portions. Gently shape each portion into a patty about 3/4 inch thick. Make a small indentation in the center of each patty with your thumb. This helps the patty cook evenly and prevents it from puffing up in the middle.
  3. Preheat Your Grill or Pan:
    • If using a grill, preheat it to medium-high heat. If using a pan, heat it over medium-high heat. For a non-stick pan, you might not need additional oil. If using a regular pan, you can add a bit of oil to prevent sticking.
  4. Cook the Patties:
    • Place the patties on the grill or in the pan. Cook for about 4 minutes on each side for medium doneness. Adjust cooking time based on your preferred level of doneness (see temperatures in the previous response for guidance).
  5. Add Cheese (Optional):
    • If you’re adding cheese, place a slice on each patty about one minute before they are done cooking. Cover with a lid to help the cheese melt.
  6. Toast the Buns:
    • While the patties are cooking, split the buns and toast them lightly on the grill or in a toaster. This adds a nice crunch and prevents the buns from getting soggy.
  7. Assemble the Burgers:
    • Place the cooked patties on the bottom half of each bun. Add your desired toppings and condiments. Finish with the top half of the bun.
  8. Serve:
    • Serve the burgers immediately while they’re hot and juicy. You can pair them with fries, a salad, or your favorite side dish.

3. Using a Meat Thermometer: The Best Way to Ensure Accuracy

 Why a Meat Thermometer is Essential
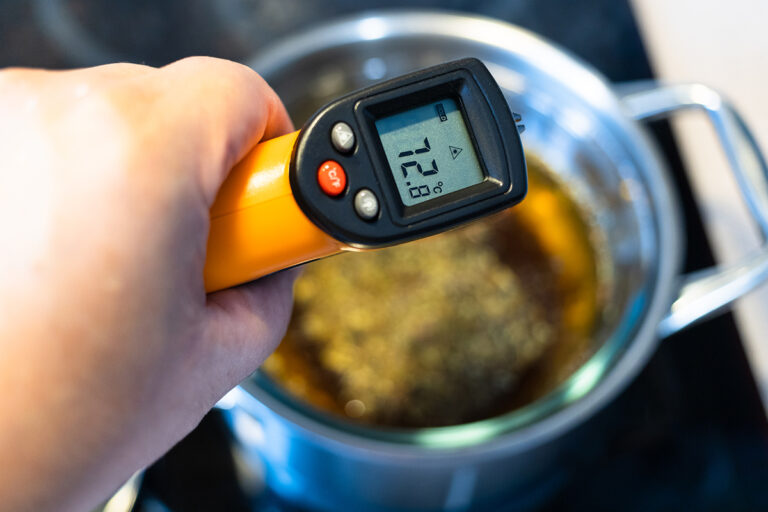
A meat thermometer is the most reliable tool for checking the internal temperature of your burger. It eliminates guesswork and helps ensure you meet the desired doneness and safety levels.

 How to Use a Meat Thermometer
Insert the thermometer into the center of the burger patty, avoiding the edges. Wait for the temperature to stabilize before reading.

4. Tips for Achieving the Perfect Hamburger Temperature

4.1 Start with a Good Quality Ground Beef
Choosing high-quality beef can influence the flavor and juiciness of your burger, making it easier to achieve the perfect temperature.

4.2 Preheat Your Grill or Pan
A well-preheated grill or pan ensures a consistent cooking temperature, which helps in cooking your burger evenly.

4.3 Avoid Pressing the Patty
Pressing down on the burger while cooking can cause juices to escape, leading to a dry patty. Let it cook undisturbed for the best results.

4.4 Let the Burger Rest
After cooking, let your burger rest for a few minutes. This allows the juices to redistribute throughout the patty, enhancing flavor and texture.

5. Common Mistakes to Avoid

5.1 Not Checking the Temperature
Guessing the doneness can lead to undercooked or overcooked burgers. Always use a thermometer for accuracy.

5.2 Cooking from Frozen
Cooking burgers from frozen can lead to uneven cooking. Thaw them properly before grilling or frying.

5.3 Overcooking
Cooking beyond the desired temperature can make your burger dry and less enjoyable. Monitor closely to avoid overcooking.

6. Safe Handling and Storage of Ground Beef

6.1 Safe Thawing Methods
Thaw ground beef in the refrigerator, not on the counter, to prevent bacterial growth.

6.2 Proper Storage
Store raw ground beef in the refrigerator for up to two days or freeze for longer storage. Always use airtight containers or wraps.

7. Enhancing Your Burger Experience

7.1 Adding Flavorful Toppings
Enhance your burger with fresh toppings like lettuce, tomatoes, and onions, or unique options like avocado and bacon.

7.2 Choosing the Right Bun
Select a bun that complements your burger’s flavor and texture. Whether it’s a classic sesame seed bun or a gourmet brioche, it should hold up to your burger’s juiciness.

8. Conclusion

Cooking the perfect hamburger involves more than just seasoning and grilling. Understanding and controlling the internal temperature is key to achieving a patty that is both delicious and safe to eat. By using a meat thermometer and following these tips, you can ensure your burgers are cooked to perfection every time.

FAQs

1. How can I tell if my hamburger is cooked without a thermometer?
While visual cues and touch can give you a rough idea, a meat thermometer is the most accurate way to ensure your burger is cooked to the right temperature.

2. Is it safe to eat a medium-rare burger?
Eating a medium-rare burger carries some risk due to potential bacterial contamination. It’s generally safer to cook ground beef to at least medium.

3. Can I use frozen beef patties for grilling?
Yes, but make sure they are thoroughly thawed before cooking to ensure even cooking.

4. How long should I let my burger rest after cooking?
Let your burger rest for about 3-5 minutes before serving to allow juices to redistribute.

5. What is the best way to reheat a cooked burger?
Reheat burgers in the oven or on a skillet to avoid drying them out. Avoid using the microwave if possible.

Continue Reading

FOOD

The Best Mee Sedap Flavors with Imaginative Recipes to Endeavor

Published

on

Mee Sedap, generally called Mie Sedaap in Indonesia, has been around beginning around 2003. This notable second noodle brand is the brainchild of WINGS Social occasion Indonesia, and they esteem using top notch trimmings and normal flavors, got together with a faultlessly changed planning itemizing. Mi Sedaap second noodles are available in 30 countries, including Malaysia and Singapore. Expecting you’ve perceived this brand on the walkways of your nearest store and are planning to look at it, read on as we uncover the really 3 Mi Sedaap flavors and proposition a couple of stimulating recipes that will take your second noodle experience to a more elevated level. Anything warm and tasty can offer a sense of delicacy to your tongue while making your mood swings subside. A bowl of chicken noodles ( Mie Sedap)  is all you need to calm down and soothe your brain fibers. A good meal can always boost your serotonin because every delicious meal makes both your stomach and soul feel satisfied and good.

Is Mi Sedaap Safeguarded to Eat?


  • Without a doubt, Mi Sedaap’s second noodles are safeguarded to eat! They meet different halal and sterilization rules, similar to the ISO 22000 Attestation for Worldwide Standards of Food dealing with The leaders and the ISO 9001 License for Overall Quality Organization System Standards.


  • The ISO 22000 Attestation ensures that Mi Sedaap has completed measures to control sterilization risks, while the ISO 9001 Authentication guarantees that the affiliation has spread out compelling cycles and arranged their staff to dependably convey faultless things.


  • With these endorsements set up, you can truly believe the security and nature of Mi Sedaap’s second noodles.


Best Mi Sedaap Flavors

In 2003, Mie Sedap made its show with 2 luscious flavor decisions: Mi Sedaap Goreng Asli and Mi Sedaap Soto. From there on out, they have stretched out their scope to integrate a varying assurance of flavors, going from singed noodles (goreng) to soups, offering a wide combination of Asian-stirred flavors to take extraordinary consideration of different tendencies.


Among their expansive goreng decision, our really 3 top picks are the Goreng Asli, Ayam Krispi, and Korean Hot Chicken. All of these flavors offer a fascinating and satisfying taste experience that makes us need to an ever increasing extent.


Mi Goreng Perisa Asli


The Mi Goreng Perisa Asli offers an excellent understanding of Mi Goreng (container burned noodles), updated by the great pound of their interesting Kriuk-Kriuk® seared onions. With an abundance of firm burned onions and thick, chewy noodles, this dish offers a superb surface that supplements the sweet, perfect and red hot notes of the dish.


If you should dial down on the force or add a smooth surface to the dish, top the noodles with a runny splendid side egg and join everything as one going before serving!


Mi Goreng Ayam Krispi


If you love burned chicken, the Mi Goreng Ayam Krispi might be most certainly right up your alley! The springy noodles gloat a tempting aroma and sort of seared chicken. Regardless, that isn’t all – even the crunchy Krezz-Krezz® cooked onion pieces are permeated with the brilliant taste of chicken, ensuring a truly satisfying encounter.


Mi Goreng Korean Searing Chicken


Mi Sedaap’s Korean Fiery Chicken flavor is the ideal choice for those in the disposition for a singing, mouth-watering experience and those expecting to begin to sweat while participating in a tasty banquet! The thick, springy noodles are planned to retain the red hot sauce, giving you a flavourful contribution in each snack. 

Read more

Continue Reading

FOOD

Lobster Love: 7 Simple Christmas Appetizers Starring Fresh Lobster Meat

Published

on

By

Lobster Love

Lobster is special. It is a fancy food that makes any dish feel extra special. This holiday season, surprise your guests with appetizers made from fresh lobster. Lobster has a rich and sweet flavor. It makes meals taste amazing. Whether you are hosting a party or want to make your Christmas meal fancy, lobster can help. It makes appetizers delicious and memorable. Try making savory lobster rolls. Or make a lobster and crab mini frittatas. These recipes are easy to make and look fantastic. Your loved ones will talk about them for sure. So, let’s explore how to use lobster. Bring joy to your holiday table with these tasty appetizers!

7 Easy and Elegant Lobster Appetizer for your Holiday Gatherings

  • Lobster & Avocado Crostini

It perfectly balances creamy avocado and sweet, succulent lobster on crispy toast.


Ingredients:

  • 1 fresh lobster tail, cooked and chopped
  • 1 ripe avocado, mashed
  • Lemon juice, to taste
  • Salt & pepper
  • Fresh parsley, chopped
  • Baguette, sliced and toasted


Steps:

  • In a bowl, mix the mashed avocado, lobster, lemon juice, salt, and pepper.
  • Spread the mixture on each toasted baguette slice.
  • Garnish with fresh parsley.
  • Serve immediately for a light, refreshing bite.

  • Lobster Deviled Eggs

A twist on the classic deviled eggs, filled with the richness of lobster and creamy mustard mayo.


Ingredients:

  • 4 boiled eggs, halved
  • 1/2 cup lobster meat, finely chopped
  • 2 tbsp mayo
  • 1 tbsp Dijon mustard
  • Lemon zest
  • Paprika for garnish


Steps: 

  • Scoop out the yolks and mash them in a bowl.
  • Mix with mayo, mustard, lemon zest, and chopped lobster.
  • Pipe or spoon the mixture back into the egg whites.
  • Garnish with paprika and serve chilled.

  • Lobster & Spinach Stuffed Mushrooms

Earthy mushrooms stuffed with a luscious lobster and spinach filling, baked to golden perfection.


Ingredients:

  • 10 large mushrooms stems removed
  • 1/2 cup lobster meat, chopped
  • 1/2 cup spinach, sautéed and chopped
  • 2 tbsp cream cheese
  • 1/4 cup grated parmesan
  • Salt and pepper


Steps: 

  • Preheat the oven to 375°F.
  • Mix the lobster, spinach, cream cheese, and parmesan in a bowl. Season with salt and pepper.
  • Stuff the mushrooms with the mixture and place on a baking sheet.
  • Bake for 15-20 minutes, until golden and bubbly.

  • Lobster Rolls on Mini Brioche Buns

Sweet lobster served in soft, buttery brioche buns, perfect for a Christmas gathering.


Ingredients:

  • 1 fresh lobster tail, cooked and chopped
  • 2 tbsp mayo
  • 1 tbsp lemon juice
  • Fresh chives, chopped
  • Mini brioche buns
  • Salt and pepper to taste


Steps: 

  • Mix the lobster, mayo, lemon juice, and chives in a bowl. Season with salt and pepper.
  • Lightly toast the mini brioche buns.
  • Spoon the lobster mixture into the buns and serve as bite-sized delights.

  • Lobster-Coconut Ceviche

A tropical, refreshing ceviche with lobster and coconut that’s perfect for adding a fresh flair to your Christmas appetizer spread.


Ingredients:

  • 1/2 lb fresh lobster meat, chopped
  • 1/2 cup coconut milk
  • 1 lime, juiced
  • 1/2 cup diced cucumber
  • 1 small red onion, finely chopped
  • Fresh cilantro, chopped
  • Salt and pepper


Steps:

  • Combine the lobster, coconut milk, lime juice, cucumber, onion, and cilantro in a bowl.
  • Season with salt and pepper.
  • Let it sit in the fridge for at least 30 minutes to allow the flavors to meld.
  • Serve chilled with tortilla chips for a refreshing holiday treat.

  • Lobster and Crab Mini Frittatas

Savory, fluffy, and packed with rich seafood flavors, these bite-sized frittatas are easy to make and look impressive on any table.


Ingredients:

  • 4 large eggs
  • 1/2 cup heavy cream
  • 1/2 cup cooked lobster meat (chopped into small pieces)
  • 1/2 cup lump crab meat (ensure it’s clean and shell-free)
  • 1/4 cup shredded Parmesan cheese
  • 1/4 cup sharp cheddar cheese (optional for extra flavor)
  • 1 small shallot, finely chopped
  • 1 clove garlic, minced
  • 2 tablespoons fresh chives, finely chopped (plus extra for garnish)
  • Salt and black pepper to taste
  • 1 tablespoon olive oil or butter (for cooking shallots and garlic)
  • Non-stick spray or butter (for greasing muffin tin)


Steps:

  • Preheat your oven to 350°F (175°C). Grease a 12-cup muffin tin with olive oil or melted butter to ensure the frittatas won’t stick.
  • Gently fold the lobster meat and crab meat together in a large bowl. Be careful not to break the pieces too much. Set aside.
  • Whisk together the eggs, heavy cream (or milk), Parmesan cheese, garlic powder, and a pinch of salt and pepper in a large bowl. Add the fresh chives and red bell pepper (if using) to the mixture. Stir to combine.
  • Spoon the lobster and crab mixture evenly into the muffin tin cups. Then, pour the egg mixture over the seafood until each muffin cup is filled but not overflowing.
  • Place the muffin tin in the oven and bake for 15-18 minutes, until the frittatas are set in the center and lightly golden on top. A toothpick inserted into the center should come out clean.
  • Once baked, allow the mini frittatas to cool for a few minutes before removing them from the muffin tin. Garnish with fresh parsley and serve warm.

Wrap-up

Lobster adds a luxurious and approachable twist to your holiday appetizers. It elevates the flavors of any gathering. You can prepare dishes like a classic lobster roll, stuffed mushrooms, or a lobster and crab mini frittatas. These dishes are easy and impressive. Lobster has a delicate sweetness. It is versatile, meaning it can be used in many different recipes. This makes lobster perfect for making the holiday season extra special. Dive in and let these simple and indulgent dishes bring the warmth of Christmas cheer to your table. Enjoy the love, the laughter, and, of course, the lobster!

Continue Reading

FOOD

How Do Wood Pellets Enhance Flavor?

Published

on

Wood pellets made from shavings and sawdust provide an ideal fuel source for cooking with a pellet fired pizza oven. They have numerous advantages over other fuel sources that affect the pizza’s final flavor. Here are some of the ways that wood pellets can enhance the flavor of pizza:

Temperature Control

Wood pellets reach high temperatures for consistent fuel feeding and aeration. The high heat inside an oven can caramelize the sugars in the pizza dough and toppings. It sears the meat used in pizza toppings to lock in its natural juices within the dough. 

A pellet fired pizza oven provides the a more precise way to control temperature for slow or fast cooking. Chefs can load this type of oven with different types of wood to control the oven’s temperature for a better result. Higher temperatures redcue the production of ashes and excess smoke that might alter the taste, while low temperatures enable slow searing.

Wood Type Variety

Pizza makers use different wood pellets for temperature control because of their distinct burn durations. Hardwoods, like oak, generate consistent heat that suits slow food preparation for meat dishes. Softer woods offer lighter and quicker ways to prepare food dishes like vegetables and white meat that do not require high heat.

Wood pellets derived from different trees produce unique aromas and flavors. Pizza chefs who want to accentuate their dishes with a bolder flavor might choose woods like hickory. This is ideal for pizza that incorporates toppings such as pork and lamb meat. Woods like oak help complement the overall pizza profile as it provides a balanced taste for the toppings and base. Businesses that want to create a sweeter profile opt for fruit woods like cherry or applewood.

Another way to enhance the pizza’s flavor is by mixing pellets made from different wood types. Hardwoods like maple often provide subtle flavor changes to the food, while fruit woods enhance the pizza’s sweetness. A good way to match wood types is to use pellets from the same variety, like oak and mesquite hardwoods.

Natural Flavor Enhancement

Wood pellets do not soak up the pizza’s natural flavor or scent, unlike regular fuels that produce excessive smoke when they are burned in ovens. The pellets gradually add the wood’s inherent flavor to the food. This makes wood pellets a favorable alternative for cooking because they suit both meat and vegetarian recipes.

Quick Flavor Release

Wood pellets are a major component of the cooking process of quality pizza because of their rapid flavor release and clean burns. Wood pellets ignite and burn quickly and can easily be added to the cooking process. They tend to burn faster because of their smaller size and generate less substances like ash, which can alter the pizza’s flavor and produce unwanted characteristics.

Buy a Pellet Fired Pizza Oven

A pellet pizza oven enables chefs to control the heat, infuse flavor, and cook faster for numerous pizza types and flavors. Look for a supplier offering various wood pellet types, like hickory, cherry, applewood, and oak. Contact a supplier today to find a model that suits your pizza production needs.

Read more

Continue Reading

Trending

Copyright © 2017 Zox News Theme. Theme by MVP Themes, powered by WordPress.